Author

Rose Rush

Browsing

What Is Asbestos and Why Is It Dangerous?

Asbestos is a naturally occurring mineral that was once widely used in construction and manufacturing due to its heat resistance and durability. However, it is now known to be highly dangerous. When asbestos-containing materials are disturbed, tiny fibers are released into the air. These fibers can be inhaled and become lodged in the lungs, leading to serious health issues over time. Diseases like asbestosis, lung cancer, and mesothelioma have all been linked to asbestos exposure. The danger lies in its invisibility—these fibers are microscopic and can remain suspended in the air for long periods, making them easy to unknowingly inhale.

Common Uses of Asbestos in Soundproofing Materials

In the past, asbestos was a popular choice for soundproofing because of its fire-resistant and noise-dampening properties. It was often mixed into acoustic ceiling tiles, wall insulation, and even certain types of drywall. If your home theater or soundproofing setup was installed before the 1980s, there’s a chance asbestos may be present. For example, some older drywall materials may still contain asbestos, as noted in asbestos in drywall. Knowing the age and origin of your materials is a crucial first step in assessing potential risks.

Health Implications of Asbestos Exposure

Exposure to asbestos is not something to take lightly. Once inhaled, the fibers can cause inflammation and scarring in the lungs, leading to long-term respiratory issues. The risk increases with prolonged exposure, but even short-term contact can be harmful. Symptoms like persistent coughing, chest pain, and shortness of breath may take years to appear, making early detection difficult. Vulnerable populations, such as children and the elderly, are particularly at risk because their respiratory systems are either still developing or already weakened. Protecting your home theater space from asbestos exposure is essential for maintaining a safe environment.

Historical Use of Asbestos in Soundproofing Applications

Why Asbestos Was Popular in Acoustic Insulation

Asbestos was once the go-to material for soundproofing due to its unique properties. It was cheap, readily available, and had excellent sound-absorbing capabilities. On top of that, asbestos was also resistant to heat and fire, making it an all-around “miracle material” for construction projects back in the day. This combination of features made it especially appealing for use in home theaters, recording studios, and other spaces where sound control mattered. However, the health risks associated with asbestos exposure were not well understood at the time, leading to its widespread use despite its dangers.

Types of Soundproofing Products Containing Asbestos

Many soundproofing materials from the mid-20th century contained asbestos. These included acoustic ceiling tiles, spray-on soundproofing coatings, and even insulation boards. Some older homes and buildings might still have these materials in place, posing a potential risk if disturbed. Identifying these products can be challenging, as asbestos fibers are microscopic and not visible to the naked eye. This is why testing is often necessary to confirm its presence.

Regulations That Phased Out Asbestos in Soundproofing

The dangers of asbestos became more widely recognized in the late 20th century, leading to stricter regulations and eventual bans on its use in many countries. In the United States, for example, the Environmental Protection Agency (EPA) began restricting asbestos use in the 1970s. By the 1980s, most asbestos-containing soundproofing products were phased out. Today, modern regulations focus on preventing exposure and ensuring that older materials are safely managed or removed. For those dealing with asbestos-related illnesses, exploring legal options for mesothelioma claims can provide some recourse.

Identifying Asbestos in Home Theater Soundproofing

Signs Your Soundproofing May Contain Asbestos

Homeowners often overlook the possibility that older soundproofing materials could contain asbestos. If your home theater was built or renovated before the 1980s, there’s a chance asbestos was used in the acoustic insulation. Look for brittle, crumbling materials or fibrous tape in walls and ceilings. These can be warning signs of asbestos presence. Additionally, any unmarked or aged insulation should be treated with suspicion.

Testing Methods for Asbestos in Acoustic Materials

Testing for asbestos isn’t something you should tackle on your own. Certified testing kits are available, but hiring a professional is often the safest route. They’ll take samples of suspect materials and analyze them in a lab. The process involves specialized equipment to detect even trace amounts of asbestos. Remember to never disturb materials you suspect might contain asbestos, as this can release dangerous fibers into the air.

Hiring Professionals for Asbestos Inspection

When it comes to asbestos, professional inspections are your best bet for peace of mind. Experts know where to look and how to handle potentially hazardous materials safely. They’ll inspect areas like wall cavities, ceiling panels, and even ductwork. Hiring a certified asbestos inspector not only ensures accurate results but also complies with legal requirements for handling asbestos. It’s a step worth taking to protect your health and your home.

Health Hazards Linked to Asbestos in Home Theaters

Respiratory Diseases Caused by Asbestos Exposure

When asbestos fibers are disturbed, they can become airborne and easily inhaled. These microscopic fibers lodge themselves deep in the lungs, causing significant damage over time. One of the most severe consequences of inhaling asbestos is mesothelioma, a rare and aggressive form of lung cancer. Other respiratory issues include asbestosis, a chronic lung disease that causes scarring of lung tissue, and an increased risk of developing lung cancer. For those exposed to loose asbestos fibers in enclosed spaces like home theaters, the risk is magnified. Asbestos exposure has been directly linked to these health conditions, particularly in environments where fibers are not properly contained.

Long-Term Risks of Asbestos in Enclosed Spaces

Home theaters often feature soundproofing materials that may contain asbestos, especially in older constructions. Over time, wear and tear or renovations can release asbestos fibers into the air. The long-term risks include not just respiratory diseases but also persistent health issues that might not show symptoms for decades. This latency period makes asbestos exposure particularly dangerous because individuals might unknowingly live with the risks for years. For example, factory workers exposed to raw asbestos during manufacturing faced similar long-term health challenges due to consistent exposure to airborne fibers. Mesothelioma and related diseases often emerge years after the initial exposure.

Vulnerable Populations and Asbestos Risks

Certain groups are more vulnerable to asbestos exposure. Children and elderly individuals are especially at risk because their respiratory systems are either still developing or weakened with age. Additionally, individuals with pre-existing respiratory conditions may experience more severe health effects from even minimal asbestos exposure. Enclosed spaces like home theaters can exacerbate these risks due to limited ventilation, allowing fibers to accumulate in the air. It’s crucial to address these risks proactively to protect these vulnerable groups from unnecessary exposure.

Modern Alternatives to Asbestos-Based Soundproofing

Safe and Effective Soundproofing Materials

In the world of soundproofing, there’s no shortage of modern materials that are both safe and effective. Asbestos-free options have become the standard, offering homeowners peace of mind without sacrificing acoustic performance. Many of these materials are designed with health and environmental safety in mind, ensuring they are non-toxic and durable. For example, recent advancements in sound-absorbing materials now focus on natural fibers, recycled composites, and even bio-based polymers. These innovations not only excel at noise reduction but also contribute to a more sustainable approach to construction.

Comparing Costs of Asbestos-Free Options

The cost of modern soundproofing materials can vary widely, but the long-term benefits often outweigh the initial investment. While some advanced acoustic solutions may seem pricey upfront, they save homeowners from potential health risks and costly asbestos removal down the line. Products like the UL-approved 6mm sound insulation membrane are not only affordable but also easy to install, offering a balance between price and performance. Homeowners should consider factors like durability, ease of installation, and overall effectiveness when comparing options.

Environmental Benefits of Modern Soundproofing

Switching to asbestos-free soundproofing materials isn’t just about safety—it’s also about protecting the planet. Many of today’s alternatives are made from recycled or sustainable resources, reducing the environmental footprint of home improvement projects. Materials like porous metals and innovative composites are gaining popularity for their ability to combine eco-friendliness with high acoustic performance. By choosing these modern solutions, homeowners can create a safe, quiet, and environmentally responsible living space.

Steps to Take If Asbestos Is Found in Your Home Theater

Immediate Actions to Minimize Exposure

Discovering asbestos in your home theater can feel overwhelming, but taking the right steps quickly is critical. The first thing to do is stop using the affected area immediately. Avoid disturbing the material, as this can release dangerous asbestos fibers into the air. Seal off the room as best as you can—close doors, cover vents, and avoid any activities that could create dust. If you suspect asbestos, resist the urge to clean or vacuum the space, as this can worsen the situation by spreading fibers.

Legal Requirements for Asbestos Removal

Once asbestos is identified, it’s important to understand the legal requirements for its removal. Federal and state laws regulate how asbestos must be handled, and these rules are designed to protect both homeowners and the environment. For instance, many jurisdictions require the involvement of certified professionals for testing and removal. Homeowners may also need to notify local authorities about the presence of asbestos before starting any removal process. To clarify your responsibilities, review your insurance policy to check if asbestos-related issues are covered. This can help you decide on the next steps for addressing the problem. File an asbestos-related claim if you believe your policy includes coverage for remediation costs.

Choosing a Certified Asbestos Abatement Company

Removing asbestos is not a DIY project. Hiring a certified asbestos abatement company is the safest option. Look for companies with proper licensing and experience in handling similar situations. During consultations, ask about their safety protocols, equipment, and disposal methods. A reputable company will provide a detailed plan, including timelines and costs. While it may seem expensive, professional abatement ensures the job is done safely, protecting your household from long-term health risks.

Legal and Regulatory Aspects of Asbestos in Soundproofing

Understanding Federal and State Asbestos Laws

Federal and state laws surrounding asbestos aim to protect public health by regulating its use, handling, and removal. The Environmental Protection Agency (EPA) enforces strict rules under the Clean Air Act, prohibiting most uses of asbestos in building materials. However, certain regulated uses, like research, are exceptions. Businesses are prohibited from importing, selling, or using asbestos-containing products unless they fall under these specific exemptions. State laws often add another layer of restrictions, ensuring compliance at a local level.

Penalties for Non-Compliance with Asbestos Regulations

Failing to follow asbestos regulations can lead to serious consequences. Penalties range from hefty fines to potential criminal charges, depending on the severity of the violation. For example, improper disposal of asbestos-containing materials or failure to notify authorities before starting abatement work can result in legal action. These penalties are designed to deter negligence and protect public safety.

How Regulations Protect Homeowners and Tenants

Asbestos regulations are not just about punishing violations—they also play a key role in safeguarding homeowners and tenants. These laws ensure that any asbestos removal or handling is done by certified professionals, minimizing the risk of exposure. Additionally, regulations mandate clear labeling of asbestos-containing products, so consumers can make informed decisions. By enforcing these rules, authorities help maintain safer living environments for everyone.

The Role of Professional Asbestos Abatement Services

What to Expect During an Asbestos Removal Process

Hiring professionals for asbestos removal is a critical step to ensure safety. The process begins with a thorough inspection to identify areas containing asbestos. Once identified, the team seals off the affected space to prevent contamination. Specialized equipment, like HEPA filters and protective gear, is used to safely remove the material. After removal, the area is cleaned and tested to confirm no asbestos fibers remain. This multi-step approach minimizes risks to both homeowners and workers.

Costs Associated with Professional Abatement

The cost of asbestos removal can vary depending on factors like the size of the affected area and the complexity of the job. Typically, homeowners can expect to pay anywhere from a few hundred to several thousand dollars. While this might seem steep, the expense is justified by the expertise and safety measures involved. For those in Northglenn, CO, professional abatement and remediation services are available to handle the job efficiently and safely.

Ensuring Safety During and After Removal

Safety is the cornerstone of any asbestos abatement project. Professionals take every precaution, from wearing protective suits to using sealed containers for disposal. After the removal, air quality tests are conducted to ensure the environment is safe for reentry. Homeowners should avoid entering the area until clearance is given. Following these steps ensures that the home remains a safe space for all occupants.

Preventing Asbestos Risks in Future Home Theater Projects

Selecting Certified Asbestos-Free Materials

When planning a home theater, choosing materials that are certified asbestos-free is a must. Ensuring your materials meet strict safety standards can save you significant trouble down the line. Look for products that explicitly state they are asbestos-free on their packaging or in their specifications. If you’re unsure, don’t hesitate to ask the vendor for documentation. Avoid older or second-hand materials, as they may pose a higher risk of containing asbestos.

Importance of Vendor Transparency in Material Sourcing

Transparency from vendors is key when sourcing materials for your project. Reputable suppliers should be able to provide clear, written guarantees that their products are free from asbestos. Ask direct questions about their sourcing practices and manufacturing processes. If the vendor hesitates or cannot provide proof, it’s a red flag. Prioritize vendors who openly share their certifications and testing results, ensuring safer choices for your home theater.

Incorporating Safety Checks in Construction Plans

A well-thought-out construction plan should include steps to minimize asbestos risks. Work with contractors who understand the importance of safety checks and are experienced in identifying potential hazards. Before starting construction, consider hiring a professional to inspect the site for any existing asbestos-containing materials. This step is especially important in older homes. If asbestos is found, you’ll need asbestos abatement to safely remove it before proceeding. In states like Ohio, regulations even require certified professionals for such tasks, as seen in asbestos abatement requirements.

Myths and Misconceptions About Asbestos in Soundproofing

Debunking Common Myths About Asbestos Safety

One of the biggest myths about asbestos is that it’s safe if undisturbed. While it’s true that intact asbestos materials are less likely to release fibers, even minor damage can cause harmful particles to become airborne. For example, asbestos sheet products used in older soundproofing setups can become hazardous if they crack or deteriorate over time. This misconception often leads homeowners to delay inspections or repairs, increasing the risk of exposure.

Misleading Claims About Asbestos-Free Products

Another common misunderstanding is that all modern soundproofing materials are automatically asbestos-free. Some products may still contain trace amounts of asbestos, especially if sourced from regions with less stringent regulations. It’s important to verify claims by checking certifications or opting for tested alternatives like fiberglass. However, even fiberglass has its own myths, as it’s often confused with asbestos due to its appearance and properties. Fiberglass, unlike asbestos, does not pose the same health risks but is still misunderstood by many.

Understanding the Real Risks of Asbestos Exposure

Many people underestimate the long-term dangers of asbestos exposure, believing that short-term contact is harmless. In reality, even brief exposure can lead to severe health issues like mesothelioma or asbestosis years later. This is particularly concerning in enclosed spaces like home theaters, where poor ventilation can trap fibers. Educating yourself about these risks and addressing potential asbestos sources promptly can make a significant difference in safeguarding your health.

The Science Behind Asbestos and Acoustic Insulation

How Asbestos Was Used to Enhance Soundproofing

Asbestos was once considered a “miracle material” for soundproofing because of its unique physical properties. Its fibrous structure allowed it to absorb sound waves effectively, reducing noise transmission in enclosed spaces. Manufacturers combined asbestos with other materials to create products like acoustic tiles, wall panels, and spray-on coatings. These products were widely used in theaters, recording studios, and even home soundproofing projects. The ability of asbestos to resist heat and fire further cemented its popularity in construction. However, its health risks were not fully understood at the time, leading to widespread use despite the dangers.

Scientific Studies on Asbestos and Sound Absorption

Research into asbestos’s soundproofing capabilities revealed that its fine fibers could trap and dissipate sound energy. This made it an ideal choice for spaces requiring noise control. Scientists also discovered that asbestos could be mixed with other materials to enhance acoustic insulation while maintaining durability. Unfortunately, later studies highlighted the risks of asbestos fibers becoming airborne, especially when materials were damaged or aged. These airborne fibers posed severe health risks, overshadowing the benefits of its acoustic properties.

Why Asbestos Is No Longer Considered Safe

The shift away from asbestos in soundproofing came after decades of research linking it to serious health conditions like mesothelioma and asbestosis. Once disturbed, asbestos-containing materials release microscopic fibers into the air, which can be inhaled and cause long-term damage to the lungs. Modern regulations have banned or severely restricted its use in most countries. Today, safer alternatives have replaced asbestos in soundproofing applications, offering similar acoustic benefits without the associated health hazards. For instance, vermiculite insulation, which sometimes contains asbestos, has been flagged as a potential risk during renovations or demolition. Learn more about vermiculite insulation risks to stay informed and safe.


Additional Websites


Sokolove Legal Group

Robert King Mesothelioma Law Services

Mesothelioma Fund

Tor Hoerman Law

Dolman Law

Mesothelioma Lawyer Center

Mesothelioma Help

Mesothelioma Hub

Weitz and Luxenberg

Lanier Law Firm

Mesothelioma.Net

Gori Law

LawFirm.com

Mesothelioma Hope

Mesothelioma Guide


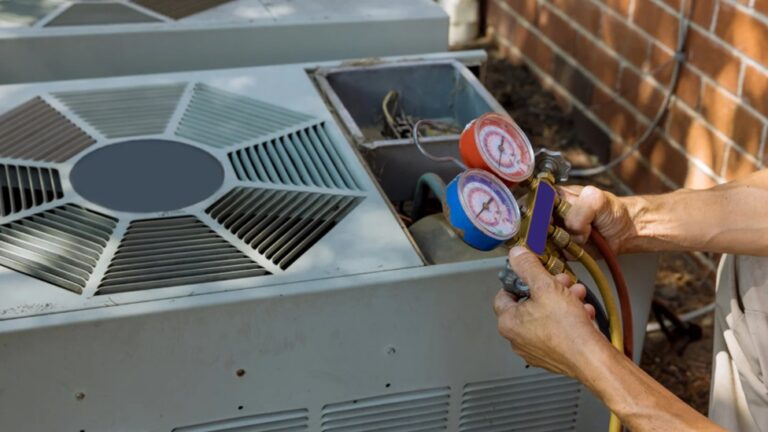
Heat pumps are a reliable and energy-efficient way to maintain comfortable indoor temperatures, whether in the chill of winter or the heat of summer. However, like all HVAC systems, heat pumps require regular maintenance to ensure they operate efficiently and without causing disturbances. If you’re looking for dependable heat pumps in Manassas or want to optimize the one you already have, this guide will help you understand the best practices to keep your system running smoothly and quietly.

The Importance of Regular Maintenance

Routine maintenance is the cornerstone of an efficient and long-lasting heat pump. Skipping regular upkeep can lead to reduced energy efficiency, increased noise levels, and unexpected breakdowns. By staying proactive, you can enhance your heat pump’s lifespan and maintain a quiet operation.

Key Benefits of Maintenance

  • Improved Efficiency: A well-maintained heat pump uses less energy, leading to lower utility bills.
  • Longer Lifespan: Regular inspections prevent premature wear and tear, extending the life of your equipment.
  • Quiet Operation: Addressing issues early ensures your heat pump operates with minimal noise, maintaining comfort without disruptions.

Common Heat Pump Noise Issues

Even the best-maintained heat pumps can occasionally make noise, but unusual sounds often signal an underlying problem. Understanding these noises can help you address them before they escalate.

What Different Noises Mean

  • Buzzing or Humming: This often indicates electrical issues, such as a failing capacitor or loose wiring.
  • Grinding or Clanging: Loose components, such as fan blades or motor parts, may be the culprit.
  • Whistling or Squealing: This may suggest restricted airflow or worn-out fan belts.

Steps to Keep Your Heat Pump Running Smoothly

A combination of routine DIY checks and professional servicing is essential to keep your heat pump functioning optimally. Here’s what you can do:

DIY Maintenance Tips

  • Clean or Replace Filters Regularly – Air filters trap dust and debris, but over time they can become clogged, reducing airflow and efficiency. Check and clean or replace filters every 1-2 months.
  • Inspect and Clear Outdoor Units – The outdoor unit is exposed to elements like leaves, dirt, and snow, which can obstruct airflow. Regularly clear debris and ensure the area around the unit is clean.
  • Monitor Thermostat Settings – Incorrect thermostat settings can cause your heat pump to overwork. Make sure the settings are appropriate for the season and consider upgrading to a programmable thermostat for better energy management.

Professional Servicing

While DIY care is crucial, scheduling professional maintenance at least once a year ensures your heat pump remains in top shape. A trained technician can:

  • Inspect and recharge refrigerant levels.
  • Test electrical components for safety and efficiency.
  • Lubricate moving parts to minimize noise.
  • Perform a full-system diagnostic to identify potential issues early.

Regular servicing not only improves efficiency but also prevents small problems from turning into costly repairs.

How to Minimize Noise

Heat pumps are designed to operate quietly, but over time, they may become noisier due to age or maintenance lapses. Here are some tips to keep your system quiet:

  • Tighten Loose Components
  • Vibrations can loosen screws and fittings over time. Periodic tightening can reduce noise.
  • Install Noise-Reducing Pads
  • Vibration pads placed under the unit can absorb sound and minimize disturbances.
  • Soundproof Nearby Walls
  • If your heat pump is near a wall, adding soundproofing material can significantly reduce noise transmission indoors.

Conclusion

Keeping your heat pump running smoothly and quietly involves consistent care and professional support. By cleaning filters, inspecting outdoor units, and addressing unusual noises promptly, you can enhance the system’s performance and lifespan. By prioritizing regular maintenance, you can enjoy a comfortable and peaceful home environment year-round.

Maintaining a home involves numerous responsibilities, but one crucial task often overlooked is regular plumbing inspections. Homeowners may not realize the significant role plumbing plays in maintaining the functionality and safety of their homes. Having done plumbing repairs in Acworth and regular inspections can prevent costly damages and ensure the longevity of your plumbing system.

Why Are Plumbing Inspections Necessary?

Plumbing systems operate continuously, making them susceptible to wear and tear over time. Regular inspections can help identify potential issues before they become major problems. For instance, if left unnoticed, minor leaks or worn-out pipes can lead to severe water damage or skyrocketing water bills. Moreover, a plumbing inspection can also highlight any code violations or safety concerns that may put your home at risk.

Benefits of Early Detection

Identifying problems early through inspections can save homeowners from expensive repairs or replacements. For example, catching a small pipe leak early could prevent the need for major repairs or water damage restoration. Regular plumbing check-ups are a proactive way to maintain your home’s value and structural integrity.

Common Issues Found During Inspections

Plumbing inspections can uncover common issues, some of which might go unnoticed during daily use. These include:

  • Clogged drains: Accumulated debris in sinks and showers can block water flow.
  • Leaking pipes: Hidden leaks can result in significant water wastage and damage.
  • Corroded or aging pipes: Older systems often require replacements to prevent failure.

For homeowners curious about improving the quality of their plumbing systems, opting for quality materials can reduce future maintenance issues and ensure long-lasting performance.

Tips for Maintaining Your Plumbing System

While inspections are critical, homeowners can also take steps to maintain their plumbing system between professional check-ups.

Look Out for Water Leaks

Hidden water leaks can lead to structural damage and mold growth if not addressed. Homeowners can follow these methods to find hidden leaks, such as monitoring water bills for unusual spikes or checking for damp spots around fixtures.

Practice Preventative Measures

Prevent clogs by avoiding flushing non-degradable items down the toilet and using drain covers to catch hair and debris. Additionally, schedule annual inspections to ensure pipes remain in good condition.

The Cost-Saving Aspect of Regular Inspections

Many homeowners hesitate to schedule regular inspections due to the associated costs. However, the expense of preventative maintenance pales compared to the cost of emergency repairs. A burst pipe or significant water damage can cost thousands of dollars in repair and inconvenience.

By addressing plumbing issues promptly through services like plumbing repair, homeowners can save money in the long run and enjoy peace of mind knowing their home is safe from unexpected plumbing failures.

Conclusion

Regular plumbing inspections are vital to home maintenance that homeowners should not neglect. They help identify potential issues, prevent costly damages, and ensure the efficiency of your plumbing system. Taking proactive steps, such as using high-quality materials and detecting leaks early, can further enhance the durability of your system.

Keep your home functioning smoothly by prioritizing regular plumbing maintenance. With proper care and attention, your plumbing system can last for years to come.

It is crucial to safeguard a property as soon as possible after a fire destroys it. A fire damage board up firm starts by thoroughly inspecting the impacted areas to identify any risks and develop a protective strategy. This thorough examination lays the groundwork for efficient board-up services by identifying exposed openings, structural flaws, and safety issues. The business makes sure the property is shielded from more harm and illegal entry by taking care of these problems. 

Let us explore five ways in which comprehensive inspections ensure safety after fire damage. 

Assessing structural integrity

Assessing the structural integrity of the property is the top concern during a fire damage examination. Unsafe situations can result from fire weakening doors, windows, walls, and other important elements. Areas that need interim stabilization or reinforcement to avoid collapse are identified by a thorough assessment. Stability must be guaranteed to prevent additional damage to the property or employees before putting up board-up materials. 

Identifying vulnerable openings

Windows, doors, and other entrance points are frequently broken or weakened by fires. The property is vulnerable to weather, vermin, and possible invaders because of these holes. To identify all vulnerabilities, a thorough assessment of these areas is part of the inspection. To properly secure the property, these openings must be recognized and addressed. 

Evaluating secondary damage

In addition to fire damage, properties may experience secondary issues such as water damage from firefighting efforts or smoke residue. An inspection identifies these problems to ensure comprehensive protection. For instance, sealing or waterproofing areas with water damage helps prevent further deterioration while the property awaits permanent repairs.

Addressing safety hazards

During the inspection, safety hazards like exposed electrical wiring, damaged roofing, or unstable debris are identified and flagged. These risks are prioritized to ensure the safety of the workers and occupants during and after the board-up process. Addressing these hazards prevents accidents and reduces liability.

Creating a customized plan

Based on the inspection, the board-up company develops a tailored strategy for securing the property. This includes selecting appropriate materials and methods to address the specific damage. Custom-fitted boards ensure that all openings are securely covered, providing optimal protection against environmental factors and unauthorized access.

The conclusion 

A comprehensive damage inspection is the cornerstone of effective fire board up services. These companies provide essential protection for fire-damaged properties. Their thorough approach ensures peace of mind and sets the stage for a smooth recovery process.


Home upgrades are not just about enhancing aesthetics—they’re about improving functionality, convenience, and safety. In Canada, where multi-level homes are common, small home elevators are becoming a popular upgrade for homeowners looking to future-proof their properties. Compact, stylish, and efficient, these elevators are a perfect addition to homes that value accessibility and modern design. Here’s how you can upgrade your Canadian home with a small home elevator.

Why Consider a Small Home Elevator?

1. Enhanced Accessibility

As mobility challenges become a concern for many Canadian families, a home elevator offers a solution that ensures easy access to all levels of the house, particularly for seniors or individuals with disabilities.

2. Increased Home Value

A small home elevator adds significant value to your property, making it more appealing to potential buyers, especially in urban centers like Toronto, Vancouver, and Calgary.

3. Space-Efficient Design

Modern small home elevators, such as those offered by Nibav Lifts, are designed to fit into compact spaces, requiring minimal structural changes​.

4. Energy Efficiency

These elevators are designed with sustainability in mind, consuming minimal energy and using innovative technologies like air-driven systems for operation​.

Steps to Upgrade Your Home with a Small Elevator

Step 1: Assess Your Home’s Needs

Start by evaluating your home’s layout and your specific requirements:

  • Who will use the elevator? Consider whether it’s for general convenience, mobility support, or both.
  • Where will it be installed? Popular locations include near staircases, centrally located hallways, or areas that connect key living spaces.

Step 2: Choose the Right Type of Elevator

Small home elevators come in various models to suit different needs:

  • Pneumatic Elevators: Compact and energy-efficient, these lifts operate using air pressure and require no pit or machine room​.
  • Hydraulic Elevators: Ideal for homes needing higher load capacities but require more space and structural modifications.

Nibav’s air-driven elevators are a popular choice in Canada due to their sleek design and easy installation​​.

Step 3: Customize Your Elevator

Modern elevators offer a range of customization options to match your home’s aesthetic:

  • Panoramic glass for a stylish, open feel.
  • Multiple color choices to complement your interior.
  • Cabin lighting options for added ambiance​.

Step 4: Work with Certified Professionals

In Canada, residential elevators must comply with strict safety standards. Ensure your installation is handled by certified technicians who understand local building codes.

Step 5: Prepare for Installation

The installation process for small home elevators is relatively quick, often completed in 24–48 hours. Minimal structural changes are required, making it ideal for both retrofits and new builds​.

Benefits of Adding a Small Home Elevator

1. Future-Proofing Your Home

Installing an elevator ensures your home remains accessible as your family’s needs change over time.

2. Improved Safety

Stairs are a common site for falls, especially for seniors or children. Elevators reduce these risks, offering a safer way to navigate your home.

3. Convenience and Comfort

Whether you’re transporting groceries, luggage, or laundry, a small elevator makes daily tasks more manageable.

4. Eco-Friendly Operation

Small elevators, like Nibav’s models, are designed to be energy-efficient, consuming less power than a standard household appliance during operation​.

Maintenance Tips for Long-Term Use

  • Schedule Regular Inspections: Ensure your elevator operates smoothly by having it inspected annually by professionals.
  • Keep It Clean: Regularly clean the cabin and controls to maintain its aesthetic and functionality.
  • Follow Manufacturer Guidelines: Adhere to maintenance recommendations provided by the elevator manufacturer​.

Why Choose Nibav Elevators for Your Canadian Home?

Nibav Lifts offers state-of-the-art small home elevators designed for modern living. With a focus on safety, style, and sustainability, their elevators are:

  • Easy to Install: Requiring no pit or machine room, installation is quick and hassle-free.
  • Aesthetically Pleasing: Panoramic glass designs and customizable options make them a stylish addition to any home.
  • Environmentally Friendly: Air-driven technology ensures low power consumption​​.

Conclusion: Elevate Your Home Today

Upgrading your Canadian home with a small elevator is a decision that brings convenience, safety, and value. Whether you’re looking to accommodate changing mobility needs, future-proof your property, or simply add a touch of luxury, a small home elevator is an investment worth considering.

Contact Nibav Lifts today to learn more about their innovative solutions and start your journey to a more accessible and stylish home​​.


When it comes to protecting your home, your roof plays a critical role in shielding you from the elements. However, even the strongest roofs can develop issues over time. Ignoring potential problems can lead to costly damage, which is why it’s important to know when to act. If you’ve noticed any signs of trouble, it might be time to call a professional. A roofer in Alpharetta can help assess and address the situation before it worsens. Here are five warning signs that indicate you need to contact a roofing expert immediately to prevent further damage to your home.

1.   Persistent Leaks or Water Stains

One of the most obvious warning signs is the appearance of water stains or leaks inside your home. These usually point to a compromised roof that’s allowing water to seep in. Ignoring leaks can result in severe water damage, mold growth, and even structural issues. If you notice this problem, don’t delay. A timely inspection by a roofer can help prevent the issue from worsening.

2.   Damaged or Missing Shingles

Shingles protect your roof from external elements. When they become cracked, curled, or go missing altogether, the roof’s integrity is compromised. If this happens, it’s crucial to get a professional evaluation. Damaged shingles can expose the underlayment to moisture, leading to more extensive and expensive repairs. For more tips on maintaining your roof, explore this guide to keep your roof in optimal condition.

3.   Sagging Roof Areas

A sagging roof is a clear indication of severe structural issues, often caused by water damage or inadequate support. This problem can escalate quickly, leading to a collapse if left unattended. The moment you notice your roof sagging, it’s critical to contact a professional roofer. In many cases, the earlier this issue is addressed, the less extensive (and less expensive) the repairs will be.

4.   Granules in the Gutters

Granules shield shingles from the sun’s intense rays, but if you notice a buildup in your gutters, it may signal that your shingles are deteriorating. As shingles lose their granules, they become less capable of protecting your roof. To prevent expensive repairs, it’s essential to have professional roofers identify hidden damages before they escalate into more serious issues.

5.   Increasing Energy Bills

If you’ve noticed your energy bills steadily rising without a clear explanation, your roof might be to blame. Poor insulation or damage to the roofing material can allow heat to escape in the winter and enter in the summer, forcing your HVAC system to work harder. An experienced roofer can assess whether your roof is adequately insulated and make necessary repairs to improve energy efficiency.

Conclusion

A well-maintained roof protects your home from weather and ensures energy efficiency. Recognizing the early signs of damage, such as water leaks, missing shingles, or granules in gutters, can help you take immediate action before the problems worsen. Regular inspections by professionals are vital to keeping your roof in top condition and avoiding expensive repairs down the line. If you notice any of the warning signs mentioned above, contact a qualified roofer for an inspection and to prevent further damage to your home.

Air conditioning installation is a significant investment that enhances comfort and energy efficiency in your home. Proper preparation before the installation can ensure a smoother process and optimal performance of your new AC system. This article provides a comprehensive checklist to help you get ready for your air conditioning installation, ensuring everything is in place for a seamless transition.

1. Evaluate Your Home’s Cooling Needs

Before scheduling your AC installation, assess your home’s cooling requirements. Consider the following factors:

  • Size of the Home: Larger homes may need a more powerful system or multiple units.
  • Insulation Quality: Well-insulated homes may require a less powerful system.
  • Window Efficiency: Homes with high-quality, energy-efficient windows might need less cooling power.

Consult with a professional HVAC contractor to determine the appropriate size and type of air conditioning system for your home. This step ensures that the ac system installation will meet your cooling needs efficiently.

2. Choose the Right AC System

Selecting the right air conditioning system is crucial for optimal performance and energy efficiency. Consider these options:

  • Central AC Systems: Ideal for cooling entire homes, these systems require ductwork.
  • Ductless Mini-Split Systems: Suitable for homes without existing ductwork, providing zoned cooling.
  • Window Units: A more affordable option for single rooms but less efficient for whole-house cooling.

Your choice will affect the installation process, so ensure that you select a system that aligns with your home’s layout and cooling needs.

3. Clear the Installation Area

Prepare the installation area to facilitate a smooth installation process:

  • Interior Space: Clear the area around the location where the indoor unit will be installed. Remove furniture, decorations, and other obstacles.
  • Exterior Space: Ensure that the outdoor unit’s installation site is free from debris and obstructions. This area should have adequate space for airflow and maintenance.

A clutter-free installation area allows the technicians to work efficiently and ensures that the AC system operates effectively.

4. Check Electrical Requirements

Air conditioning systems require a dedicated electrical circuit to function safely and efficiently. Verify the following:

  • Electrical Panel: Ensure that your home’s electrical panel can handle the additional load of the new AC system. You may need an upgrade if the panel is outdated or overloaded.
  • Electrical Wiring: Check that the wiring is up to code and in good condition. An electrician can help assess and update your home’s electrical system if necessary.

Proper electrical preparation prevents potential issues during installation and ensures safe operation of the AC system.

5. Ensure Proper Ventilation

Good ventilation is essential for efficient AC system performance. Address these aspects:

  • Ductwork Inspection: If you are installing a central AC system, have your ductwork inspected for leaks or damage. Properly sealed ducts improve efficiency and indoor air quality.
  • Vent Placement: Ensure that vents and registers are unobstructed and positioned to allow even distribution of cool air.

Proper ventilation helps the AC system perform efficiently and enhances overall comfort in your home.

6. Schedule a Professional Installation

Air conditioning installation should be performed by a licensed HVAC professional. Consider the following when scheduling your installation:

  • Timing: Schedule the installation during a time when you can be present to oversee the process and address any questions.
  • Contractor: Choose a reputable contractor with experience in ac installation. Verify their credentials and read customer reviews to ensure quality workmanship.

A professional installation guarantees that your AC system is set up correctly and operates efficiently.

7. Review Manufacturer’s Instructions

Before the installation, familiarize yourself with the manufacturer’s instructions for your new AC system. This includes:

  • Warranty Information: Understand the terms and conditions of your system’s warranty, including coverage and maintenance requirements.
  • Operating Instructions: Learn about the system’s features and how to operate it effectively.

Understanding the manufacturer’s guidelines helps you maintain your AC system properly and ensures that you make the most of your investment.

8. Prepare for the Installation Day

On the day of installation, be ready for the following:

  • Access: Provide the installers with clear access to both the indoor and outdoor installation areas.
  • Questions: Prepare any questions you have about the installation process or the new AC system. This is a good time to discuss any concerns with the installers.

Being well-prepared on installation day ensures a smooth process and allows you to start enjoying the benefits of your new air conditioning system sooner.

Conclusion

Preparing your home for air conditioning installation involves several crucial steps, from evaluating your cooling needs to ensuring proper ventilation and scheduling a professional installation. By following this pre-installation checklist, you can help ensure that your AC system is installed efficiently and performs optimally, providing you with enhanced comfort and energy savings for years to come.


Tennis courts, like any other sports surface, endure wear and tear over time due to environmental factors and frequent use. Regular inspections and maintenance are essential for preserving the playing surface and ensuring optimal performance. Professional services dedicated to tennis court repair in Georgia can significantly extend the lifespan of various types of courts, including clay, grass, and hard surfaces. This article will outline what to expect during a professional tennis court repair.

Thorough Inspection

A professional tennis court repair service begins with a thorough inspection of the playing surface. Professionals will check for any cracks, unevenness, or damage on the court’s surface and surrounding areas. They will also assess the drainage system to ensure proper water flow and prevent potential hazards.

During this process, professionals may use specialized equipment such as laser levels to accurately measure the court’s slope and determine if it meets industry standards. This step is crucial in identifying any underlying issues that may need further attention during the repair process. It is recommended to inspect your tennis court at least once a year, preferably before the start of the playing season. This will help identify any issues early on and prevent further damage. For more information on how often to inspect your tennis court, you may check out this blog.

Repairing Cracks and Uneven Surfaces

Cracks and uneven surfaces are common problems that occur on tennis courts over time. These issues can negatively affect the game and pose safety hazards for players. To address these problems, professionals will use specialized techniques and materials to repair cracks and level out any uneven surfaces. This may involve filling in cracks with acrylic or rubber-based coatings and using leveling agents to even out the surface.

Resurfacing

Resurfacing is another critical step in repairing tennis courts that have significant wear and tear. It involves applying a new layer of material over the existing playing surface to restore its original condition. Depending on the type of court surface, professionals may use different techniques and materials for resurfacing.

Repainting Lines

Properly marked lines are crucial for any tennis court, as they help players stay within bounds during gameplay. As part of the repair process, professionals will repaint the lines with precise measurements and angles to ensure accuracy.

They may also use specialized equipment, such as line-taping machines, to achieve straight lines and prevent bleeds or smudges. Additionally, professionals may use highly durable paint to withstand frequent use and harsh weather conditions.

Final Touch-Ups

Once all the necessary repairs and resurfacing are complete, professionals will conduct a final inspection to ensure that everything meets industry standards. They will also perform any touch-ups or minor repairs to address any remaining issues. During this stage, they may also provide recommendations for future maintenance and care of the tennis court to help extend its lifespan.

Conclusion

Understanding the signs your tennis court needs repair and knowing what to expect during a professional tennis court repair can help ensure the longevity of your playing surface. Regular inspections and maintenance by professionals are essential for preserving the quality and safety of any tennis court. If you notice any signs of wear and tear, it is best to address them promptly to prevent further damage. With proper care and maintenance, your tennis court can continue to provide a high-quality playing surface for years to come.

Introduction

Biking may be an amazing way to stay energetic and examine the exterior. Be that because it may, putting your bicycle can presently and after that be a challenge, especially on the off chance that you just live in a small space like a hang or a house with obliged capacity choices.  

In this comprehensive direct, we are going explore the assorted sorts of bicycle racks open for carports and deliver tips on how to choose the finest one for your needs.  

Sorts of Bike Racks for Garage   

1. Wall-Mounted Bike Racks  

Wall-mounted bike racks are an extraordinary space-saving choice for carports with compelled floor space. These racks routinely interface with the divider and allow you to hang your bike vertically, keeping it off the ground and out of the way.  

2. Ceiling-Mounted Bike Racks  

These bicycle racks are commonly presented utilizing pulley systems or catches, allowing you to viably lift and lower your bike for capacity and recuperation.  

3. Detached Bicycle Racks 

Detached bicycle racks are a flexible alternative for garages with plentiful floor space. These racks come in different styles, such as vertical stands, level racks, and gravity stands.

Detached bicycle racks are simple to move around, making them a helpful choice if you would like adaptability in your Garage format.  

Variables to Consider When Choosing a Bicycle Rack  

1. Bicycle Capacity 

Consider how numerous bicycles you wish to store and select a bicycle rack that can oblige your whole collection. A few bicycle racks are planned to hold different bicycles, making them perfect for families with different cyclists.  

2. Space Imperatives 

Assess the accessible space in your Garage and select a bicycle rack that fits inside your format. These bike racks are great choices for maximizing vertical space, whereas detached racks are way better suited for garages with sufficient floor space.  

3. Bicycle Weight and Measure 

Make beyond any doubt the bicycle rack you select can back the weight and measure of your bicycle. Distinctive racks have changing weight capacities and measurements, so be beyond any doubt to check the specifications before making a buy.  

4. Establishment and Gathering 

Consider how simple it is to introduce and gather the bicycle rack. A few racks require boring into dividers or ceilings, whereas others can be set up without any apparatuses. Select a bicycle rack that adjusts together with your consolation level for installation.  

Advantages of purchasing a bike rack for Garage

Contributing to a bike rack for garage offers a few benefits, including:

1. Organized Capacity: 

Keep your bicycles perfectly put away and effectively open, lessening clutter in your Garage.

2. Space Optimization: 

Maximize your Garage space by utilizing vertical or even capacity choices with a bicycle rack.

3. Protection: 

Prevent harm to your bicycle by putting it safely on a rack, absent from potential dangers on the ground.

4. Comfort: 

Effectively get to your bicycle at whatever point you are prepared to ride without having to explore through a cluttered Garage.  

Conclusion 

A bicycle rack for your Garage could be a common and productive arrangement for putting away your bicycles while keeping your space organized. By considering the diverse sorts of bicycle racks available, key factors for determination, and the benefits they offer, you will select the leading bicycle rack to suit your needs.

Whether you want a wall-mounted, ceiling-mounted, or detached bicycle rack, contributing in appropriate capacity for your bicycles will assist you in appreciating cycling while keeping up a clean Garage space.


Shifting is often described as one of the most stressful life events. The boxes, the endless to-do lists, and the emotional whirlwind can leave anyone feeling overwhelmed. But what if you could unlock the secrets to navigating a move in Lansing, Michigan, with ease and confidence? Whether you’re a local looking to relocate within the Greater Lansing area, a first-time home buyer, or someone moving to Lansing, this comprehensive guide is designed to smoothen every step of the process.

Packing Pointers for a Smooth Transition

Packing is the nitty-gritty of moving. It can be dull, but with the following strategies in place, it doesn’t have to be disorganized or despairing.

Declutter Before You Pack

Moving to a new place offers a wonderful chance to declutter and simplify your life. Take the time to carefully go through your belongings, determining what items are truly essential to bring along, what can be donated to those in need, and what is best to discard. Remember, the fewer belongings you relocate, the more cost-effective and stress-free your shifting experience will be. By streamlining your possessions, you not only lighten your load physically but also mentally, creating a fresh start in your new space.

Pack Smart, Not Hard

Investing in good-quality shifting boxes and packing materials is crucial for a smooth shifting process. When it comes to packing delicate or fragile items, it’s important not to skimp on protective materials like bubble wrap or packing peanuts. To make unpacking easier, consider leaving clothes on hangers and placing them in wardrobe boxes to minimize the need for folding and ironing upon arrival at your new home. Additionally, remember the golden rule of packing – place heavier items in smaller boxes to avoid strain and lighter items in larger boxes for easier handling.

Label Everything

An efficient and well-thought-out labelling system can be a lifesaver during the unpacking phase of a move. By implementing a system of colour-coded labels, such as green for the kitchen and blue for the bedroom, you can streamline the process for yourself and your shifting team. This simple strategy ensures that every box is swiftly delivered to its designated room, saving you valuable time and energy in the long run.

Making the Most of Your New Space

Once you’ve arrived in Lansing, settling into your new home is a chance to start fresh. Taking the time to properly establish your new living space can set the tone for a rejuvenating chapter in your life.

Unpack the Essentials First

Pack a separate box with the essentials you’ll need for the first few days, including toiletries, a change of clothes, and any important documents. This survival kit will help you avoid the frustration of rummaging through boxes to find something urgent.

Personalize Your Space

Personal touches can transform a house into a home. Hang up your favourite photographs, display cherished mementos, and invest in furniture that suits the unique layout of your new space. Making your new Lansing abode feel personal creates a sense of familiarity and comfort.

Explore Your New Neighborhood

Getting to know your Lansing neighbourhood is an exciting part of the shifting process. Find your local grocery store, your nearest coffee shop, and your go-to walking routes. Familiarize yourself with your environment to establish a sense of belonging and routine.

Anticipating and Overcoming Moving Hurdles

Despite the best laid-out plans, moving rarely goes off without a hitch. The true test lies in how you handle these inevitable challenges.

Dealing with Delays and Setbacks

Weather, traffic, or paperwork mishaps can lead to unwanted delays. Stay flexible and have contingency plans in place. Having a support network can also help soften the blow and provide you with a sense of control even in the face of unexpected changes.

Coping with Moving Stress

Shifting is inherently stressful, and it’s important to acknowledge that. Take regular breaks, practice self-care, and get plenty of rest. Engaging in stress-relief activities, such as yoga or taking a walk in one of Lansing’s beautiful parks, can also help you stay centred.

Adjusting to Post-Move Life

Post-move, it’s normal to feel a bit out of sorts. It can take time to adjust to your new surroundings and develop a routine. Be patient with yourself and your family, and remember that it takes time for a house to truly feel like home.

In Conclusion, a Stress-Free Move is Possible

A stress-free move, while it might seem like a distant dream, is achievable with proper planning, organisation, and the right mindset. By decluttering your life before the move, packing intelligently, and labelling everything, you can streamline the transition and reduce the chaos typically associated with moving. The key to a smooth transition into your new Lansing home lies in thorough preparation and utilising the strategies outlined in this guide. Upon arrival, prioritising the setup of your living essentials and injecting personal touches into your space will help in quickly transforming your new house into a home. Furthermore, exploring your new neighbourhood and finding your new favourite spots will assist in establishing a sense of belonging in Lansing. Remember to anticipate potential hurdles, remain adaptable, and give yourself and your family time to adjust to this new chapter.  Moving to Lansing is not just about relocating your belongings; it’s about transitioning to a new lifestyle and creating a fresh start.