Category

HVAC Contractor

Category

Air conditioning installation is a significant investment that enhances comfort and energy efficiency in your home. Proper preparation before the installation can ensure a smoother process and optimal performance of your new AC system. This article provides a comprehensive checklist to help you get ready for your air conditioning installation, ensuring everything is in place for a seamless transition.

1. Evaluate Your Home’s Cooling Needs

Before scheduling your AC installation, assess your home’s cooling requirements. Consider the following factors:

  • Size of the Home: Larger homes may need a more powerful system or multiple units.
  • Insulation Quality: Well-insulated homes may require a less powerful system.
  • Window Efficiency: Homes with high-quality, energy-efficient windows might need less cooling power.

Consult with a professional HVAC contractor to determine the appropriate size and type of air conditioning system for your home. This step ensures that the ac system installation will meet your cooling needs efficiently.

2. Choose the Right AC System

Selecting the right air conditioning system is crucial for optimal performance and energy efficiency. Consider these options:

  • Central AC Systems: Ideal for cooling entire homes, these systems require ductwork.
  • Ductless Mini-Split Systems: Suitable for homes without existing ductwork, providing zoned cooling.
  • Window Units: A more affordable option for single rooms but less efficient for whole-house cooling.

Your choice will affect the installation process, so ensure that you select a system that aligns with your home’s layout and cooling needs.

3. Clear the Installation Area

Prepare the installation area to facilitate a smooth installation process:

  • Interior Space: Clear the area around the location where the indoor unit will be installed. Remove furniture, decorations, and other obstacles.
  • Exterior Space: Ensure that the outdoor unit’s installation site is free from debris and obstructions. This area should have adequate space for airflow and maintenance.

A clutter-free installation area allows the technicians to work efficiently and ensures that the AC system operates effectively.

4. Check Electrical Requirements

Air conditioning systems require a dedicated electrical circuit to function safely and efficiently. Verify the following:

  • Electrical Panel: Ensure that your home’s electrical panel can handle the additional load of the new AC system. You may need an upgrade if the panel is outdated or overloaded.
  • Electrical Wiring: Check that the wiring is up to code and in good condition. An electrician can help assess and update your home’s electrical system if necessary.

Proper electrical preparation prevents potential issues during installation and ensures safe operation of the AC system.

5. Ensure Proper Ventilation

Good ventilation is essential for efficient AC system performance. Address these aspects:

  • Ductwork Inspection: If you are installing a central AC system, have your ductwork inspected for leaks or damage. Properly sealed ducts improve efficiency and indoor air quality.
  • Vent Placement: Ensure that vents and registers are unobstructed and positioned to allow even distribution of cool air.

Proper ventilation helps the AC system perform efficiently and enhances overall comfort in your home.

6. Schedule a Professional Installation

Air conditioning installation should be performed by a licensed HVAC professional. Consider the following when scheduling your installation:

  • Timing: Schedule the installation during a time when you can be present to oversee the process and address any questions.
  • Contractor: Choose a reputable contractor with experience in ac installation. Verify their credentials and read customer reviews to ensure quality workmanship.

A professional installation guarantees that your AC system is set up correctly and operates efficiently.

7. Review Manufacturer’s Instructions

Before the installation, familiarize yourself with the manufacturer’s instructions for your new AC system. This includes:

  • Warranty Information: Understand the terms and conditions of your system’s warranty, including coverage and maintenance requirements.
  • Operating Instructions: Learn about the system’s features and how to operate it effectively.

Understanding the manufacturer’s guidelines helps you maintain your AC system properly and ensures that you make the most of your investment.

8. Prepare for the Installation Day

On the day of installation, be ready for the following:

  • Access: Provide the installers with clear access to both the indoor and outdoor installation areas.
  • Questions: Prepare any questions you have about the installation process or the new AC system. This is a good time to discuss any concerns with the installers.

Being well-prepared on installation day ensures a smooth process and allows you to start enjoying the benefits of your new air conditioning system sooner.

Conclusion

Preparing your home for air conditioning installation involves several crucial steps, from evaluating your cooling needs to ensuring proper ventilation and scheduling a professional installation. By following this pre-installation checklist, you can help ensure that your AC system is installed efficiently and performs optimally, providing you with enhanced comfort and energy savings for years to come.

 

Understanding the Significance of 3D BIM Modeling

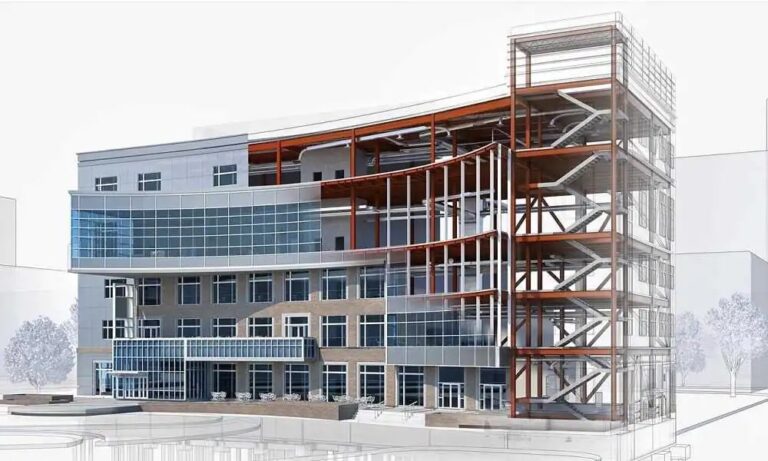
In the realm of modern construction, 3D BIM Modeling has emerged as a pivotal technology. It allows for the creation of detailed, digital representations of buildings or structures. These models not only encompass geometric shapes but also encompass essential information about components and systems within the structure. The immersive and collaborative nature of 3D BIM modeling fosters better visualization, coordination, and communication among stakeholders throughout the project lifecycle.

Efficiency Amplification Through Outsourcing

Outsourcing 3D BIM Modeling is increasingly gaining traction among construction firms worldwide. This strategic move is primarily driven by its potential to significantly amplify operational efficiency. By entrusting these tasks to specialized external entities, companies can tap into a pool of expert professionals proficient in advanced software and methodologies. This expertise often leads to faster project completion, reduced errors, and enhanced quality in design and construction documentation.

Cost Rationalization and Risk Mitigation

One of the most compelling advantages of outsourcing 3D BIM Modeling Services lies in its cost-effectiveness. Construction companies can substantially cut down on overhead expenses by availing themselves of outsourced services, eliminating the need for in-house infrastructure and specialized workforce training. Moreover, outsourcing mitigates the risk of errors or delays commonly associated with inexperience, ensuring smoother project execution within predetermined timelines.

Industry Insights and Trends

According to recent industry insights, the global construction industry is poised for significant growth, with an increasing inclination toward digitization and innovative technologies. Statistically, studies have shown a notable surge in the adoption of BIM technologies, indicating a projected market size of over $10 billion by 2025. This upward trajectory underscores the pivotal role that 3D BIM Modeling Services play in modern construction practices.

Why Outsource to India CAD Works?

Among the plethora of options available for outsourcing 3D BIM Modeling Services, India CAD Works stands out as a beacon of expertise and reliability. Leveraging India CAD Works for these services offers a multitude of benefits. Firstly, they boast a team of highly skilled professionals well-versed in the intricacies of BIM technology. Secondly, their cost-effective solutions without compromising on quality make them an attractive choice for global firms aiming to optimize their budgets. Additionally, the time zone advantage ensures seamless collaboration and faster project turnarounds.

The Advantages of Partnering with India CAD Works

Partnering with India CAD Works presents a myriad of advantages. Their adeptness in delivering accurate and detailed 3D models ensures superior project visualization and design coordination. The utilization of cutting-edge technology coupled with industry best practices guarantees the highest quality standards. Furthermore, their customer-centric approach and commitment to meeting deadlines ensure a hassle-free outsourcing experience.

Conclusion:

The strategic advantage of outsourcing 3D BIM Modeling Services in construction projects cannot be overstated. With the rapid evolution of technology and the growing complexity of construction endeavors, leveraging specialized expertise through outsourcing is becoming a cornerstone of success for companies striving for efficiency, cost-effectiveness, and innovation in the construction landscape. India CAD Works emerges as an exemplary partner in this journey, offering unparalleled proficiency and value to companies seeking to elevate their construction projects through expertly executed 3D BIM Modeling Services.

It’s getting hot outside, which means your pet is probably looking for a way to cool off. Did you know that there are some things you can do to help keep your pets safe and comfortable during the summer months? This article will discuss some HVAC tips for pet owners. We will give you advice on how to keep your pets safe and comfortable, as well as how to deal with common problems.

1. Buy the Right HVAC System for Your Home

The first step is to make sure that you have an HVAC system that is right for your home. If you have a pet, you will need to consider their needs. For example, you will not need a large or powerful system if you have a small dog. Conversely, if you have a large dog, you will need a more powerful system. It would help if you also considered the climate in your area. If you live in a hot climate, you will need a system that is designed for that climate.

Once you have an HVAC system that is right for your home, you need to make sure that it is properly installed. And the best way to do that is to hire a professional for HVAC installation in Hinsdale, as they will be able to install your system quickly and correctly. They will also be able to give you tips on maintaining your system so that it lasts for many years.

2. Clean the Vents

Another important tip is to make sure that you clean the vents in your home. Dust and dirt can build upon these surfaces, which can then be circulated through your home by the HVAC system. This can cause allergies and respiratory problems. So, when you clean the vents, it cleans the quality of air and eliminates the potential for your pet to react.

In order to clean the vents, you will need to turn off the power to the HVAC system. Next, remove the vents and vacuum them with a soft brush attachment. If there are a lot of build-ups, you may need to hire a professional to clean the vents for you.

3. Change the Filter More Frequently

One of the most important things you can do for your pet is to change the air filter in your HVAC system. A dirty air filter can cause a number of problems for your pet, including allergies and respiratory problems. Changing the air filter can help fix this problem by improving the air quality in your home by making a healthier environment for your pet. Additionally, changing the air filter can help improve your HVAC system’s efficiency, which can save you money on your energy bills. By understanding the benefits of changing air filters, you can be sure to keep your pet healthy and comfortable all summer long.

To Conclude

These are just a few of the many HVAC tips for pet owners. If you want to learn more about HVAC systems, you can contact a professional HVAC company. They will be able to give you more information on how to take care of your HVAC system and help you choose the right system for your home.

Breaking down of furnace can be extremely frustrating. So, if your furnace stops working, don’t panic. There are a few things you can do to try and fix the problem. However, before you start fixing the furnace yourself, it’s important to understand that furnaces are complex pieces of machinery, and attempting repairs without proper training or experience can be extremely dangerous. In this article, we’ll go over a few things you can do if your furnace stops working and when it’s time to call in a professional.

1. Check Your Thermostat

One of the most common reasons a furnace will stop working is because the thermostat is set too low. If your thermostat is set below the temperature of your home, the furnace will shut off. To check if this is the problem, simply turn up the thermostat and see if the furnace turns back on.

If it does, you know that was the problem, but if it doesn’t, there may be a more serious issue. In this case, you will have to call an expert in services for heating in Atlanta to take a look and see what might be wrong. They will further investigate the issue and let you know what needs to be done to repair it.

2. Check Furnace’s Power Supply

Another common reason a furnace may stop working is that it has lost power. This could be due to a problem with the fuse box or a tripped circuit breaker. To check if this is the problem, start by checking the fuse box. If you see that a fuse has blown, simply replace it with a new one.

If the problem is a tripped circuit breaker, you will need to reset it. To do this, simply locate the breaker box and find the switch that is in the “off” position. Once you’ve found it, flip it back to the “on” position. If the furnace still doesn’t turn on, there may be a more serious issue, and you will need to call in a professional. It is also important that you know the different types of furnaces as this will help you understand which one you have at home and how it works to be able to fix it easily.

3. Check for Gas Leaks

If your furnace uses gas to operate, it’s important to check for gas leaks before attempting any repairs. Gas leaks can be extremely dangerous and should only be handled by a trained professional. If you suspect there may be a gas leak, the best thing to do is open all the doors and windows in your home to ventilate the area and then call your gas company. They will send someone out to safely check for and repair any gas leaks.

To Conclude

If you’ve checked all of these things and your furnace still isn’t working, it’s time to call in a professional. Trying to repair a furnace yourself can be extremely dangerous and should only be done by someone with the proper training and experience.

As the hot summer is about to arrive, lots of household owners are considering cleaning their houses and lawns in preparation for the flood of activities they have prepared for summer. Beat the Heat with this Easy Summer Home Prep.

5 air conditioning tips for summer

  1. Check the HVAC unit

Before the heat wanders inside, you need to go through and check your HVAC unit by switching it on for a short period. If the system needs repair, you would have a small amount of time to get it done before the arrival of extreme winter.

  1. Check whether there are any hindrances around the system

The outer portion of yourHVAC Virginia Highlandssystem consists of various components. Compressor is one major part of these components. Ensure to clear any hindrances away from your air conditioner. Any plants, bushes, and other lawn items must be at least one or two feet away from the system. If you find any dust or debris around the system, take the time to blow the leaves away, vacuum out the dust, and clean the cage or anything else that may be hindering the airflow.

  1. Replace the filters often

Make sure you check thoroughly and replace the HVAC filters for getting all set for the hot summer arriving soon. When the AC unit is utilized often, you need to ensure the filters are cleaned and changed at least once a month. A clogged or filthy filter could cause the system to freeze up, if not break down totally. A clean filter would let the air run smoothly into the system and lower the quantity of pollution in your house.

  1. Check the ducts

Ventilation is a crucial part of the summer heating and cooling unit. While there is a cluster of leaks and holes inside your ducts, you would find yourself losing loads of air you are paying to cool.

Holes or cracks in the ductwork can cost you 20 percent extra on your electricity bill. Seal the holes and make sure that all of the connectors are tight.

  1. Install a programmable thermostat

Many households nowadays are using a programmable thermostat. This new technology can help in reducing electricity costs. Also, depending on the weather, you can set the temperature you want in your home. If you know that you will be leaving the house, you can schedule your system to switch off or allow the inside temperature to increase slightly.