Tag

stop

Browsing

Smart thermostats make it easier than ever to control your home’s temperature. You can adjust settings from your phone, create schedules, and even save energy. But if they are installed or programmed incorrectly, they can actually create problems for your heat pump. So why do repair calls sometimes increase after upgrading to a smart thermostat?

The answer often comes down to compatibility, setup, and system operation.

Not Every Thermostat Works With Every Heat Pump

Heat pumps are more complex than traditional heating and cooling systems. Many models rely on multiple operating stages and auxiliary heat to maintain indoor comfort.

If a smart thermostat is not compatible with your specific heat pump or is wired incorrectly, it may send the wrong signals. This can cause the system to switch modes at the wrong time, run longer than necessary, or cycle more often than it should.

Incorrect Settings Can Overwork The System

Even a compatible thermostat needs the right programming. Features designed to maximize comfort may accidentally increase wear on your equipment.

For example, aggressive temperature setbacks can force the heat pump to work much harder to reach the desired temperature. In some cases, the auxiliary heating system turns on more often than needed, increasing energy use and placing extra stress on system components.

Frequent Cycling Causes Extra Wear

Smart thermostats constantly monitor indoor conditions and may adjust operation more frequently than older models.

While small adjustments can improve comfort, excessive cycling is not ideal. Starting and stopping the heat pump too often places added strain on motors, compressors, and electrical components. Over time, this extra wear can lead to unexpected repair needs.

Software Updates And User Changes Matter

Many homeowners enjoy experimenting with thermostat settings through mobile apps. However, frequent schedule changes or software updates can sometimes affect how the system operates.

If comfort suddenly changes after adjusting settings, the issue may not be the heat pump itself. A professional inspection can determine whether the thermostat configuration is causing the problem.

Proper Installation Makes All The Difference

A smart thermostat should work with your heat pump, not against it. Correct wiring, accurate programming, and system testing help ensure everything operates efficiently from day one.

Service Champions helps homeowners across Southern California choose compatible smart thermostats and configure them correctly. Our experienced technicians verify that the thermostat communicates properly with the heat pump, helping improve comfort while reducing unnecessary strain on the system.

Conclusion

Smart thermostats are valuable upgrades, but they are not simply plug-and-play devices. Incorrect installation, incompatible equipment, or poor programming can all contribute to additional heat pump repairs. With proper setup and expert guidance from Service Champions, you can enjoy the convenience of smart technology while keeping your heating and cooling system running efficiently for years to come.

It’s incredibly sad to see a tree you’ve adored for so many years slowly decrease in size. It’s not obvious at first. It begins slowly. The leaves begin to lose their color. The branches appear less sturdy. Maybe the bark appears different. It is possible to tell yourself it’s a seasonal problem or that the weather isn’t going well. You observe that the plant is dying, and you wonder “How can I save an old plant?”

You aren’t what you believe. They are complex, long-lasting organic living things. The plant’s health is affected by numerous factors, including the sun, soil, water and insects. It is possible for a tree to appear be unhealthy, however it may be having a tough period. Sometimes, it is essential to intervene. Be cautious and watchful.

This guide takes you through both the basics and some deeper strategies–practical steps, a few science-backed methods, and even some personal reflections on what it feels like to bring life back to a struggling tree.

Know the Signs

Find out the cause first. Make sure you identify the problem before you try to repair it.

These warning signs are seen everywhere.

  • One reason could be the yellowing or browning of leaves.
  • Take off the twigs that are smaller.
  • If the bark is been peeled or cracked, this could be a sign of a disease or pest.
  • There are mushrooms and other weird growths at bottom of trees.
  • The canopy’s top appears to shrink each year.

Even with the signs there’s a chance in saving the trees. They’re signals. The first step towards the revival of a dying tree is knowing how to interpret these signals.

Essentials of Restoring a dying tree

It’s easy to revive a dying tree. If you want to help a dying tree to be revived it should be watered regularly and thoroughly. It is also possible to mulch or eliminate dead or diseased branches, and apply organic mulch on a healthy tree. It is preferential to stimulate the tree rather than to shock it.

There’s more. Check for signs of disease, pests and soil problems to identify the issue. Seek the advice of an arborist professional in the event that the issue continues to persist after having tried every remedy. It is recommended to conduct a an analysis of the soil or control with pesticides.

These steps may appear simple however there are a myriad of options and subtleties.

Water is an extremely important steps, yet it is the one that is most neglected

Schultz talks about the most common mistakes that people make when taking care of trees that are suffering. The most frequent errors is not watering the trees regularly. If you do not water your trees regularly enough they could get sick.

  • Make sure to water the roots thoroughly. Sprinklers will only soak the top layer regardless of the amount of water they are using or how many zones there are, or at what period they operate at. The roots remain thirsty. Slowly pouring water on the soil is vital.
  • It is important to remember that the frequency at which you are watering will depend on the soil, climate and season. In the summer months you might need to water more often.
  • Newly planted trees, stressed trees or are new to an area require continuous moisture.

Begin by putting water on an older tree.

Mulching is more than an visual appeal

Mulch doesn’t just make your garden look nice. Mulch organically will help to make your garden more lush. It can protect your soil from heat and water loss from fire, and will also add nutrients as it breaks down. Apply mulch around the tree’s base up to a thickness that is between two and four inches. Be careful not to pile the mulch on the tree’s trunk. The “mulch volcanic” effect actually kills insects and draws in insects.

Mulching can aid trees in recovering and help create a more healthy environment.

Pruning can be a method to reduce costs by reducing.

It may feel counterintuitive–cutting parts of a tree to save it. Pruning is among the most efficient ways to save trees.

  • Take away any sick or dead branches. Get rid of all diseased or dead branches.
  • Make sure to use clean, sharp tools to prevent any further injury.
  • Concentrate on corrective pruning instead of decorative shaping if the tree is struggling.

Pruning can be an art as well as a science. If it is done properly it can bring about a significant improvement to the life span of the dying tree. If it is done wrong, it can cause a lot of stress on an already fragile system.

The base of our existence is the health of the soil.

Signs and symptoms that are visible on trees are usually an indication of the conditions beneath the ground. A poor soil could be an important factor in slow growth.

  • Organic materials, compost or specific nutrients could be a major factor.
  • A soil test is a good way to detect any problems. A tree could slowly starve if it is surrounded by excess clay or not enough nitrogen, or has poor drainage.
  • Through aerating the dirt oxygen can get to the roots.

Healthy soil is crucial to healthy plants. Begin by examining the soil beneath your feet if you wish to revive the life of a dying plant.

Silent pests and disease

The problem isn’t always the water or soil. The problem is not always that the earth or even the water. It could be surprising to find out how your plant is dying faster than you think due to beetles and fungi.

Find:

  • Leaves with holes or marks irregularly made
  • Borers are identified by the sawdust-like substance that is at their bottom.
  • White Residue with a Powdery Color

Specific treatments can be helpful in controlling the spread of diseases and pests that impact trees. Natural remedies, such as Neem sprays, and beneficial bugs, are extremely beneficial. In the most extreme instances medical assistance or chemical treatment might be required.

It is essential to identify these issues early.

Stress: A determinant which is often ignored

They are sensitized to the environment they live in. Stress can result from construction, foot traffic, or the compacted soil.

Reduce the stress on the tree in order to help it recover. This can be achieved by either reducing soil compactness or providing the tree with more space.

There are many solutions that are not easy to find. There are many solutions that seem to be obvious.

DIY as well as professional

You can complete basic pruning or watering, as well as mulching your own. However, some situations aren’t DIY.

The professional tree care services can comprise:

  • Analyse soil to determine nutritional deficiencies.
  • Pest control that is advanced.
  • Structures that are trimmed to stop collapse are prevented.
  • Plan long-term restoration.

After trying all the basics and haven’t seen any improvements It is completely acceptable to consult an arborist. This is a great method to boost the health of your tree.

Tree recovery: Select green alternatives

It’s not essential to fix them immediately. You must strengthen them to ensure they last for many years.

  • Organic fertilizers, composting as well as natural ones are a part of the eco-friendly tree maintenance.
  • Replant your plant with drought resistant plants.
  • In order to avoid imbalances in nutrients, it can be accomplished by revolving mulching materials.

Sustainability refers to the capacity of a tree to endure its surroundings.

A Few Reflections on My Personal Life

The trees that I believed were old-fashioned, shocked me. A small maple tree I lived in completely lost its leaves in one summer. I thought it was dead. Following careful trimming and adding compost, it was covered with a brand clean green covering.

Also, I had have to give up the trees I had tried to save. The trunk was covered with mold. The trunk was severely damaged. It’s not always feasible to beat the odds. It is best not to be wasting your time. The next time around you’ll have more time to prepare.

Summary of practical steps

Here are some suggestions to aid in the restoration of trees that are unhealthy If I had the time:

  1. It is essential to re-water regularly and thoroughly (but not overly or too often).
  2. Mulch to increase the retention of soil water and also to hold.
  3. Get rid of dead or diseased trees.
  4. Make sure the soil is in good condition and amend it as needed.
  5. The early application of measures to control pests is crucial to pest control.
  6. Reduce stress from construction, traffic, and compaction.
  7. Consult a professional if your issue persists.

This is the basis for how to revive an older tree. Although it’s easy to accomplish however, there are a lot of fine aspects to consider when digging deeper.

Last Thoughts: Patience, Perspective and Perspective

The trees have an entirely different pattern than we do. The trees grow slowly and then recover. The inability to see immediate results is a source of frustration. Tree rehabilitation takes patience and expertise along with the correct strategies.

It is possible to bring back a dying tree through perseverance, science and careful observation. Mulch, water, soil as well as pest control and pruning are all crucial. Give the tree enough time.

You’ll be better equipped to care for the next tree in case you’re unable to save the first tree

This post was written by a professional arborist at Arborist St Petersburg FL. Robert Miller is the owner of Arbor Wise Professional Tree Care, a locally owned and operated tree service company that offers superb lawn care by the most experienced Arborists. Arborwise Tree Services is a tree removal company that offers stump removal, tree pruning, stump grinding, fertilization, and tree restoration. We have an extraordinary lawn care industry notoriety covering the Pinellas county area.

A roof in St. George faces more than occasional rain. Prolonged sun, high summer temperatures, blowing dust, sudden monsoon storms, and sharp temperature changes can wear down roofing materials faster than many homeowners expect. A roof may look serviceable from the ground while sealants are drying out, flashing is loosening, or shingles are becoming brittle.

For homeowners, the goal is not simply to repair the most visible problem. It is to keep a small roofing defect from becoming interior water damage, insulation loss, or an emergency replacement during the next storm.

Desert Conditions Create Specific Roofing Problems

Ultraviolet exposure is one of the most persistent sources of roof damage in southern Utah. Repeated sun exposure can cause asphalt shingles to lose flexibility and protective granules. Over time, the material may crack, curl, or become more vulnerable to wind.

Heat also affects the components around the roof. Sealants can dry and shrink, while flashing around chimneys, vents, skylights, and wall transitions may develop gaps. These areas deserve close attention because water often enters through a small transition point rather than through the middle of an otherwise intact roof.

Monsoon weather adds another concern. A roof that has tolerated months of heat may suddenly face heavy rain and strong wind. Leaves, dust, and debris can collect near drainage points, allowing water to back up around low spots or roof penetrations. Even a short storm can expose weaknesses that remained unnoticed during the dry season.

Homes near St. George also experience different conditions depending on elevation and surroundings. Properties in exposed areas may receive more wind, while homes near mature trees may deal with branches, clogged gutters, and organic buildup. A roofing evaluation should account for the property’s actual setting instead of relying on a one-size-fits-all recommendation.

Choosing Repairs Based on the Roof’s Real Condition

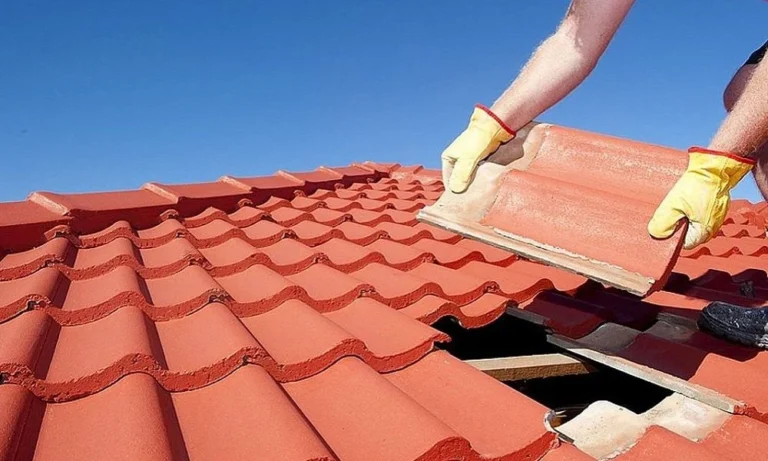
When damage is limited, targeted repairs may protect the roof for years. Replacing missing shingles, resealing a vent, correcting loose flashing, or improving drainage can be more cost-effective than replacing the entire roof. However, a repair is only useful when it addresses the source of the problem.

Homeowners comparing roofers St George should look for an inspection that explains both immediate defects and broader wear. A useful assessment should identify the age and condition of the roofing system, examine flashing and penetrations, and note signs of moisture in the attic or ceilings. Photos and clear descriptions can help a homeowner understand whether the recommendation is a small repair, maintenance work, or a replacement that should be planned.

The lowest estimate is not always the least expensive option. A patch that fails during a storm can lead to damaged drywall, flooring, cabinetry, and personal belongings. On the other hand, replacing a roof that has many serviceable years remaining may create an unnecessary expense. A written scope of work helps homeowners compare materials, labor, ventilation needs, cleanup, and warranty terms on equal footing.

Timing Matters Before the Wet Season

Late spring and early summer are practical times to schedule a roof inspection. Completing maintenance before the strongest heat and monsoon activity can reduce the chance of discovering a leak when contractors are busy and storms are already moving through the area.

Homeowners should also pay attention after a major wind or rain event. Look for loose roofing material in the yard, new stains on ceilings or walls, sagging gutters, or water in the attic. These signs warrant prompt attention, even if the leak appears to have stopped. Water can travel along framing and insulation before becoming visible inside the home.

A Durable Roof Starts With Ongoing Attention

Roofing decisions in St. George should balance immediate cost with long-term protection. Quality materials matter, but so do correct installation, sound flashing, adequate ventilation, and regular inspection. Scheduling a professional review once a year-and after severe weather-can help identify manageable problems before they affect the living space.

For homeowners, reliable roofing support means having a clear picture of the roof’s condition and a practical plan for the next season. That approach protects the home, reduces avoidable emergency costs, and helps ensure the roof is ready when desert weather changes without warning.

Every bathroom renovation starts with a single, pressing question: how do you choose furniture that not only fits your space and style, but also respects your plumbing setup? It’s a puzzle that merges aesthetic ambition with practical reality, and the right answer can transform a cramped washroom into an oasis of comfort and efficiency.

Understanding Your Bathroom Space and Plumbing Constraints

The first step is honest measurement. Take note of the width, depth, and height of your available space, but don’t stop there. The swing of your door, the placement of windows, and the pathways people use all affect where furniture can live. Even the most beautiful vanity can become a nuisance if it blocks your bathroom door or restricts movement.

Plumbing deserves its own scrutiny. Are the pipes set up for a wall-mounted or a floor-standing unit? Is your sink drain straight down or does it travel through the wall? These details dictate what furniture you can install without costly rerouting or awkward compromises. For example, an exposed S-trap under the sink might require a different vanity style than a hidden P-trap inside the wall.

Choosing Bathroom Furniture Based on Plumbing Compatibility

There’s a big difference between wall-mounted and freestanding vanities. Wall-mounted models can make a room feel larger and allow easy cleaning underneath, but they demand sturdy walls and careful alignment with plumbing. Freestanding units, on the other hand, often provide more storage and flexibility, but take up more visible floor space.

The number of sinks matters, too. Small powder rooms usually call for compact, single-sink vanities, while larger bathrooms can accommodate double vanities. But before dreaming of dual basins, make sure your plumbing and room layout can support the extra drain and water lines.

Pairing sinks, faucets, and vanities requires attention to dimensions and fixture compatibility. Ideally, your furniture will allow easy access for repairs and future upgrades. For unique or older homes, you might encounter custom plumbing situations that require bespoke cabinetry or creative solutions. In these cases, collaborating with a designer or specialist can save you headaches.

Harmonizing Bathroom Furniture with Your Style and Functionality Needs

Start by defining your style. Is your vision modern minimalism, classic elegance, or an eclectic blend? The materials you choose, whether matte lacquer, wood veneer, or stone countertops, should echo that style. Color and finish play a crucial role. If you’re after a cohesive look, coordinate your vanity with other bathroom elements, like mirrors and shelving.

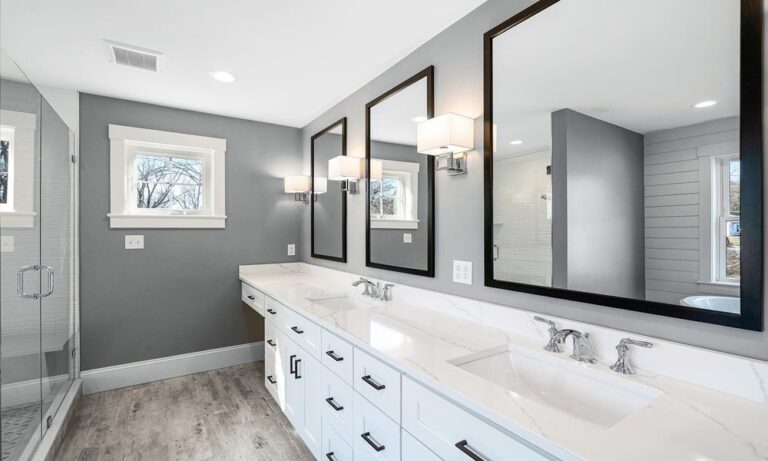
Storage is where style meets substance. Deep drawers, open shelves, and integrated organizers all offer ways to keep clutter at bay while supporting your aesthetic. Accessories tie the whole look together. Sleek chrome faucets, statement mirrors, and well-placed lighting can elevate even the simplest furniture choices, making your bathroom feel intentional and inviting.

Optimizing Storage and Organization in Your Bathroom Furniture

Bathrooms are storage battlegrounds. Consider what you need to stash: daily toiletries, towels, cleaning supplies, or personal luxuries? Drawers work well for smaller items, while cabinets or taller towers handle larger essentials. Open shelving adds a decorative touch but may require more attention to organization.

For tight spaces, wall-mounted cabinets or slimline vanities free up valuable square footage. Modular systems and customizable inserts allow you to adapt storage as your needs evolve, making sure there’s a place for everything without sacrificing style.

Practical Tips for Selecting the Right Size and Configuration

Every bathroom is different. Powder rooms benefit from small, efficient furniture, while ensuites and family bathrooms can support more expansive solutions. The golden rule: match your furniture size to the actual usage and traffic flow, not just the room’s dimensions.

Counter space is precious, but overcrowding makes daily rituals stressful. Choose a vanity that offers enough surface area without swallowing up the room. Accessibility is also key, drawers should glide open easily, and nothing should block the flow within the room.

Leveraging Expert Help and Showroom Resources

Browsing online is useful, but nothing compares to seeing finishes and proportions in person. Visiting a showroom lets you interact with actual products and get a feel for their quality and scale. Many showrooms offer free consultations, where experienced designers can help you clarify your vision and troubleshoot tricky plumbing or layout questions.

Mockups and samples make final decisions far easier. You can see how a vanité Vasca Design actually looks with your preferred countertop or faucet, helping you avoid costly mistakes.

Maintaining and Caring for Your Bathroom Furniture

Proper maintenance extends the life of your investment. Use gentle cleansers and avoid abrasive tools that can scratch or dull finishes. Wipe up water spills promptly to prevent damage, especially on wood or laminate surfaces. Periodically check for loose hardware or minor wear, addressing issues early before they become expensive repairs.

Finally, keep the future in mind. If you anticipate another renovation down the road, choose flexible designs that can be refreshed with new finishes or hardware, making sure your bathroom remains both functional and stylish for years to come.

Choosing bathroom furniture is a dance between practicality and personal expression. By understanding your space, respecting your plumbing, and curating pieces that reflect your style, you can craft a bathroom that delights the eye and serves your daily needs with effortless grace.

If your garage lights have started flickering, dimming unexpectedly, buzzing, or failing altogether, the problem may be much deeper than a burned-out bulb. In many Austin, Texas homes, garages are one of the first places where electrical issues begin to show themselves. Because garages experience heat, dust, humidity changes, vibration, and heavy electrical usage, they often become an early warning system for larger electrical problems throughout the home.

Many homeowners searching for a Trusted Electrician In Austin, TX are surprised to learn that garage lighting problems can reveal overloaded circuits, deteriorating wiring, moisture intrusion, and even dangerous connection failures hidden behind walls. What looks like a simple lighting issue can quickly turn into a safety concern if ignored for too long.

In Austin, where temperatures regularly climb and garages are used for everything from workshops to home gyms and EV charging stations, lighting systems work harder than many people realize. Understanding why garage lights fail can help homeowners catch electrical problems early before they spread to the rest of the property.

Why Garages Often Reveal Electrical Problems First

Garages are unique spaces. Unlike climate-controlled living rooms or bedrooms, garages face constant environmental stress. In Austin homes, garages experience extreme summer heat, occasional moisture issues during storms, and fluctuating temperatures that can accelerate wear on electrical components.

Most garages also support heavier electrical demands than they did decades ago. Today’s garages may power:

  • Refrigerators or freezers
  • Power tools
  • Air compressors
  • EV chargers
  • Home gym equipment
  • Additional refrigerators
  • Workshop lighting
  • Smart home systems

Older garage electrical systems were rarely designed for modern electrical loads. As a result, lighting fixtures and circuits often begin showing warning signs before major electrical failures occur elsewhere in the home.

This is one reason many homeowners contact a Trusted Electrician In Austin, TX after noticing repeated garage lighting problems that never seem to fully go away.

Failing Ballasts and LED Drivers

One of the most common causes of garage lighting failure involves failing ballasts or LED drivers.

Older garages throughout Austin still use fluorescent tube fixtures. These fixtures rely on ballasts to regulate electrical current. Over time, ballasts wear out due to age, heat exposure, and voltage fluctuations.

Signs of a failing ballast may include:

  • Lights flickering repeatedly
  • Delayed startup
  • Buzzing or humming sounds
  • Dim lighting
  • Blackened tube ends
  • Random shutoffs

Austin’s summer temperatures can dramatically shorten ballast lifespan, especially in garages with poor ventilation. Excessive heat causes internal electrical components to degrade much faster.

Newer LED fixtures use drivers instead of ballasts. While LEDs are more energy efficient, their drivers can still fail when exposed to excessive heat or poor installation conditions. Cheap LED fixtures are especially vulnerable to early driver failure.

Many homeowners attempt to replace bulbs without realizing the actual issue lies deeper within the fixture itself.

A Trusted Electrician In Austin, Texas can properly diagnose whether the issue involves the bulbs, ballast, driver, wiring, or circuit itself rather than simply replacing parts that may not solve the root problem.

Overheating Garage Fixtures

Heat is one of the biggest enemies of electrical systems in Texas garages.

Garages in Austin can easily exceed 110 degrees during the summer. That extreme heat builds up inside lighting fixtures, junction boxes, and electrical connections. Over time, overheating can cause:

  • Brittle wire insulation
  • Melted fixture components
  • Loose electrical terminals
  • Premature bulb failure
  • Burned wiring
  • Circuit damage

Many homeowners unknowingly install lighting fixtures that are not rated for garage conditions. Enclosed fixtures without proper ventilation can trap heat and accelerate component failure.

Another issue involves insulation contact. Some recessed garage fixtures are improperly surrounded by insulation, preventing heat from escaping safely.

In severe cases, overheating fixtures can become fire hazards.

This is why homeowners often contact a Trusted Electrician In Austin, TX after noticing burning smells, discolored fixtures, or lights that suddenly stop working during hot weather.

Loose Wiring Connections Behind Garage Lights

Loose electrical connections are extremely common in garages, especially in older Austin homes.

Garages experience more vibration than most other rooms in a house. Opening and closing garage doors creates repeated vibration over the years, which can gradually loosen wire connections inside fixtures, switches, outlets, and junction boxes.

Loose wiring can cause:

  • Intermittent flickering
  • Arcing
  • Sparking
  • Hot switches
  • Random power loss
  • Tripping breakers
  • Electrical buzzing sounds

What makes loose wiring dangerous is that it often worsens slowly over time. Many homeowners ignore occasional flickering for months or even years before the issue becomes severe.

In some cases, loose connections can create enough resistance to generate dangerous heat inside walls.

Garage lighting issues sometimes reveal older aluminum wiring problems as well. Homes built decades ago may contain wiring methods or splice connections that no longer perform safely under modern electrical loads.

A properly trained Trusted Electrician In Austin, TX can inspect these hidden connections safely and identify whether the issue is isolated or part of a larger electrical concern throughout the home.

Moisture Intrusion and Corrosion

Although garages seem dry most of the time, moisture intrusion is surprisingly common in Austin-area homes.

Humidity, rainwater intrusion, slab moisture, and condensation can all affect garage electrical systems. This is especially true for garages with poor insulation or damaged weather seals.

Moisture can slowly corrode:

  • Fixture contacts
  • Wire terminals
  • Junction boxes
  • Switches
  • GFCI outlets
  • Breaker connections

Corrosion increases electrical resistance, which leads to overheating, flickering, and eventual component failure.

Homeowners sometimes notice rust-colored staining near fixtures or experience lights that work inconsistently after heavy rainstorms.

Garages attached to homes with HVAC duct leakage may also experience hidden condensation problems that slowly damage electrical systems over time.

Moisture-related electrical issues should never be ignored because water and electricity create serious safety hazards.

This is another reason homeowners often rely on a Trusted Electrician In Austin, TX when recurring garage lighting problems seem tied to weather or humidity changes.

Overloaded Garage Circuits

Modern garages use far more electricity than they were originally designed to handle.

In many older Austin homes, garages may only have a single 15-amp or 20-amp circuit serving:

  • Lighting
  • Garage door openers
  • Wall outlets
  • Refrigerators
  • Outdoor outlets

Once homeowners add power tools, freezers, EV chargers, compressors, or workout equipment, those circuits can become overloaded quickly.

Overloaded circuits commonly cause:

  • Dimming lights
  • Flickering fixtures
  • Frequent breaker trips
  • Warm outlets
  • Reduced fixture lifespan

Sometimes garage lights dim every time a refrigerator compressor or garage door motor starts. This may indicate excessive voltage drop caused by overloaded wiring.

Unfortunately, repeatedly resetting breakers does not solve the underlying problem.

A licensed electrician can determine whether the garage requires:

  • Dedicated circuits
  • Panel upgrades
  • Subpanel installations
  • Circuit redistribution
  • Wiring upgrades

Many homeowners searching for a Trusted Electrician In Austin, TX discover their lighting issue is actually part of a larger electrical capacity problem affecting the home.

Problems During Fluorescent-to-LED Conversions

One growing issue throughout Austin involves improper fluorescent-to-LED conversions.

Many homeowners attempt DIY upgrades to modern LED garage lighting without understanding how the wiring systems differ. Some LED retrofit tubes require ballast bypass rewiring, while others are plug-and-play compatible.

Incorrect conversions can create:

  • Flickering LEDs
  • Shortened bulb lifespan
  • Fire hazards
  • Fixture overheating
  • Electrical code violations
  • Partial fixture failure

Improperly bypassed ballasts are especially dangerous when wiring connections are not completed correctly.

Additionally, some older garage fixtures simply are not compatible with certain LED retrofits. Cheap retrofit kits may also struggle in high-heat garage environments.

While LED upgrades can dramatically improve garage brightness and energy efficiency, proper installation matters.

A Trusted Electrician In Austin, TX can help homeowners select fixtures designed specifically for Texas garage conditions while ensuring all wiring remains safe and code compliant.

Should Homeowners Attempt Garage Lighting Repairs Themselves?

Many homeowners are comfortable replacing light bulbs, swapping simple fixtures, or installing basic LED upgrades. However, diagnosing electrical failures becomes much more complicated once wiring, overheating, or circuit problems are involved.

DIY electrical work may seem straightforward online, but garage electrical systems can hide serious hazards behind walls and ceilings.

Homeowners should generally avoid DIY electrical repairs when dealing with:

  • Flickering that continues after bulb replacement
  • Burn smells
  • Tripping breakers
  • Aluminum wiring
  • Moisture exposure
  • Melted fixtures
  • Overloaded circuits
  • Ballast bypass rewiring
  • Hot switches or outlets
  • Unknown wiring conditions

Texas electrical codes exist for safety reasons, and improperly completed electrical work can create fire risks or insurance complications later.

In Austin, licensed electricians are trained to safely troubleshoot hidden electrical faults, test circuits correctly, and ensure repairs meet local code requirements.

For simple cosmetic fixture swaps, experienced homeowners may handle the work safely if power is properly disconnected and wiring conditions are straightforward. But when recurring lighting problems continue appearing, it is usually best to contact Texas licensed electricians Austin homeowners trust.

Garage Lighting Problems Should Never Be Ignored

Garage lighting issues are rarely just about lighting alone. In many Austin homes, they serve as early warning signs of larger electrical concerns developing behind the scenes.

Flickering fixtures, failing LEDs, buzzing fluorescent lights, overheating housings, and dimming circuits often point toward aging infrastructure, overloaded electrical systems, loose wiring, or moisture-related damage.

Addressing these problems early can help homeowners avoid more expensive repairs later while improving safety throughout the property.

Whether the issue involves outdated fluorescent fixtures, overloaded garage circuits, hidden wiring damage, or failed LED conversions, working with a Trusted Electrician In Austin, TX can help identify the true source of the problem before it spreads to the rest of the home.

In a city like Austin, where garages serve as workshops, storage spaces, fitness rooms, and charging stations all at once, electrical systems deserve more attention than many homeowners realize. When garage lights begin failing repeatedly, the smartest approach is often to treat it as an opportunity to uncover deeper electrical issues before they become dangerous.

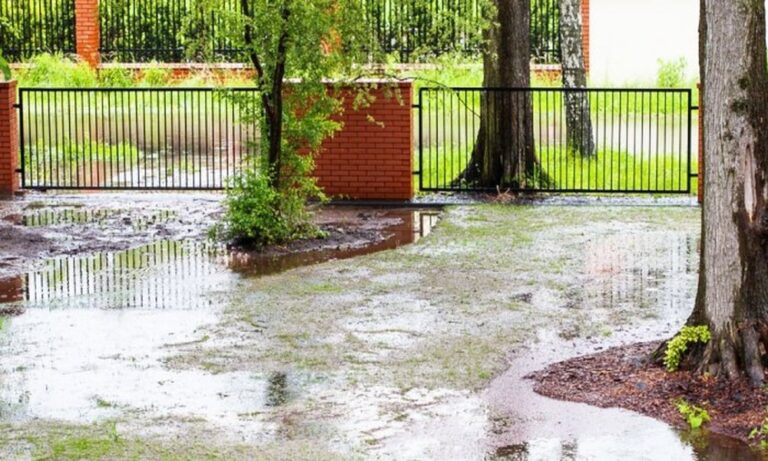
Most homeowners blame lawns, patios, or blocked drains when their garden stays wet. Fencing rarely gets mentioned. Yet after decades working across York, I can say with confidence that many long-term drainage problems begin right at the boundary. I see it on inspections all the time. People search for fencing companies near me because posts are rotting or panels are leaning, but the real issue often sits in the soil along the fence line. Many homeowners first look at York Fencing because they want to understand why the same damp problems keep returning, even after repairs.

Drainage issues at boundaries develop quietly. They rarely flood dramatically. Instead, they soften soil, weaken posts, and slowly damage fencing until failure feels inevitable.

Why fence lines change how water behaves

Fence lines interrupt natural water flow. Digging post holes, pouring concrete, and altering ground levels all affect how rain moves through soil.

In York, clay soil dominates many gardens. Clay drains slowly. When a fence is installed without considering this, water often collects where posts meet the ground.

From years on site, I have learned to spot drainage issues by feel. Soil near fence lines stays soft longer. Footprints linger. Moss forms. Grass thins. These signs usually appear long before a fence fails.

How post holes quietly create drainage problems

Every post hole changes soil structure. Clay compacts easily when wet. Once compacted, it drains poorly.

If a post hole is backfilled without care, the soil around it becomes denser than the surrounding ground. Water follows the path of least resistance and settles there.

I often remove posts to find soil that feels almost sealed, holding moisture against the timber. Over time, this leads to rot at ground level.

Concrete and its unintended side effects

Concrete is essential for stability, but it alters drainage. A solid plug of concrete can act like a bowl if installed poorly.

Water runs down the post and sits on top of the concrete. Without drainage beneath, it has nowhere to go.

On good installations, I usually allow for drainage at the base of the hole. Gravel beneath the concrete lets water escape downward rather than pooling around timber.

Older fences rarely include this detail.

Why gravel boards affect more than appearance

Gravel boards are designed to protect panels from ground contact, but they also influence drainage.

When gravel boards sit too low or ground levels rise against them, water collects along the fence base. This keeps soil saturated and accelerates post decay.

Correct height matters. Gravel boards should protect timber without trapping water against the fence line.

Shade and airflow at boundaries

Fence lines often receive less sunlight and airflow than the rest of the garden. Tall panels block wind and cast shade.

This slows evaporation. Soil stays damp longer after rain. In clay, that means prolonged softness.

Homeowners notice this when one strip of the garden never quite dries, even in summer.

Why posts fail faster in poorly drained ground

Posts rely on firm soil to resist movement. Waterlogged ground offers little support.

I usually install posts at around 600mm to 750mm depth to reach more stable ground, but even deep posts struggle if water cannot drain.

Repeated wetting weakens soil structure. Posts loosen. Fixings strain. Panels shift.

The fence does not collapse overnight. It degrades steadily.

How drainage problems spread along the fence line

Drainage issues rarely stay local. Once water collects along one section, it often spreads.

Soil erosion exposes concrete. Adjacent posts become affected. Rails begin to sag as alignment changes.

This is why homeowners often see multiple posts failing within a short period.

Why repairs rarely solve drainage-led failures

Repairs focus on symptoms. A leaning post is reset. A rotten post is replaced.

If drainage is not improved, the same conditions remain. Water continues to collect. Soil stays weak.

Homeowners searching for fence repair near me often face repeat problems because the underlying drainage issue has not been addressed.

When repairs still make sense

Repairs can work if drainage problems are minor and localised. Improving ground levels. Adding drainage gravel. Adjusting gravel boards.

Knowing when repairs will hold is key. Many homeowners review fence repairs guidance to understand whether repairs will genuinely extend lifespan or simply delay replacement.

If multiple posts show signs of rot or movement, replacement with improved ground preparation usually makes more sense.

How fencing design influences drainage

Design choices affect drainage. Solid gravel boards and continuous panels trap moisture.

Designs that allow airflow help soil dry faster. Hit and miss fencing, slatted sections, and stepped heights reduce damp build-up along boundaries.

These choices support both fence longevity and healthier soil.

Composite fencing does not remove drainage concerns

Composite fencing does not rot, but it still relies on posts set in soil.

Composite fencing cost often reflects durability above ground, but drainage remains critical below ground. Poor drainage still leads to movement and alignment issues.

Even low maintenance materials need stable, well-drained foundations.

Why garden slope matters at fence lines

Slope plays a big role. Fence lines at the bottom of a slope collect runoff from higher ground.

Without proper planning, water pools along the boundary. Soil becomes saturated. Posts suffer.

During replacement, small changes to ground levels can redirect water away from fences and solve long-standing problems.

How fence lines affect surrounding planting

Poor drainage near fences affects planting too. Roots struggle in compacted, wet soil. Plants thin or fail.

Homeowners often replace plants repeatedly without realising the fence line is the cause.

Improving drainage benefits both fencing and planting health.

Why older fences often create long-term drainage damage

Older fencing installations often ignored drainage entirely. Posts were set shallow. Concrete filled holes completely. Ground was left uneven.

Over decades, this created persistent damp zones along boundaries.

Replacing fencing without addressing these issues simply resets the clock.

How planned replacement fixes drainage problems properly

Replacement allows drainage issues to be corrected properly. Post holes can be prepared correctly. Gravel added. Ground levels adjusted.

Homeowners often notice gardens drying more evenly after replacement, even in wet weather.

This improvement often surprises people, but it makes sense once the boundary is no longer trapping water.

The link between drainage and fence lifespan

Drainage and lifespan are directly connected. Drier soil supports posts. Reduced moisture slows rot. Alignment holds longer.

Fences that sit in well-drained ground last significantly longer than those surrounded by damp soil.

This is one of the most overlooked factors in fence longevity.

Why homeowners are noticing drainage issues sooner

More time spent at home means people notice their gardens more. Remote work has sharpened awareness of damp areas and slow-drying ground.

Homeowners now spot drainage problems earlier and act before fences fail completely.

This awareness is driving better decisions.

What to look for if your fence line stays wet

There are a few simple checks homeowners can make.

  • Does soil near the fence stay soft longer than elsewhere?
  • Is moss forming at the base of panels?
  • Do posts feel loose when pushed gently?
  • Are gravel boards sitting below ground level?
  • Does water pool after rain?

These signs point to drainage issues rather than simple wear.

Why drainage should be part of every fencing conversation

Drainage affects fence stability, lifespan, and garden health. Ignoring it leads to repeated problems.

Homeowners exploring garden fencing increasingly ask about drainage because they have seen what happens when it is overlooked.

How understanding drainage changes fencing outcomes

Once drainage is addressed, fences perform better. Posts stay firm. Panels remain aligned. Maintenance drops.

From decades working across York, it is clear that many garden drainage problems begin at the fence line. Homeowners who recognise this early and address drainage during installation or replacement end up with fences that last longer and gardens that recover faster after rain. The boundary stops fighting the land and starts working with it.

If you are moving, it can be pretty pricey and many individuals look for ways to make it more affordable but not at the cost of safety or convenience. Avoid the double charge Nobody likes the idea of paying for two companies, one to move your stuff to a new location, and another to keep it in storage, but hiring a removalist with storage is one of the best saving choices you can make. It has two-part value, one bundling the services which makes it easy, reduce handling, and avoid unnecessary fees. This simple choice will make your move a lot cheaper and here is how.

Why Bundling Makes Sense

With separate moving and storage companies, you pay for transport two times − first for the trip to the storage unit, and second for the trip from the unit to your house. This leads to each loading and unloading process taking twice as much labour, fuel, and time.

A bogged down combined service: everything with one provider. Your items are picked up, kept and brought to you without the need for additional stops that add to costs and time. The entire workflow is efficiently managed by a proficient removalist with storage.

Fewer Trips = Lower Costs

This is one of the most common causes of relocation budget blowouts − multiple trips. Each trip requires:

  • Additional travel time
  • Labour hours
  • Fuel costs
  • Loading and unloading

With a bundled service, the company collects your items at once and delivers them directly to storage. Then when you are ready, they move them directly to your new location. Less KMS, less passengers, less invoices to deal with − one provider.

Reduced Risk of Damage

The greater amount of handling your possession goes through, the greater the risk of something getting damaged. If the item is shipped via more than one company, it could be transferred up to five times before it reaches its final destination. A higher number of transfers means a higher chance of breakage, scratches, and lost boxes.

Less handling − as one team handles everything (removal + storage). This means:

  • Consistent packing quality
  • Proper stacking inside the truck
  • Ensured placement within the storage unit
  • Professional accountability at every stage

Just you do not need to move them, then your stuff is secure and you will save hundreds of money from spare parts replacement and repair.

Faster, More Organised Moving Process

With one team handling both the moving and storage, the process ensures clear communication and timely schedules. Your roles where there is no ambiguity in terms of who does what − or when.

Bundled services offer:

  • One point of contact
  • Clear scheduling
  • Coordinated pickup and delivery
  • For larger or more delicate items better planning

Such coordination alleviates the stress of having to make several arrangements and saves you time, particularly for elaborate moves or short-term setting.

Discounts and Package Deals

Most providers give you a discount on rates if you bundle. With both aspects managed by the organisation, it enables them to present you with competitive pricing which you would lack if you were to separate the pieces of work over two separate agencies.

You may save on:

  • Hourly labour rates
  • Truck hire fees
  • Storage units
  • Additional packing materials

Often, a sizeable moving invoice turns into something much more manageable by selecting a removalist storage package.

Perfect for Delayed Move-Ins

In some cases, your new home simply isn’t prepared yet − improvements, negotiation hold-ups, or lease overlaps occur. Instead of racing to tackle storage as the 11th hour approaches, bundled services serve as a seamless transition.

Your belongings are:

  • Packed
  • Transported
  • Stored safely
  • Delivered when you’re ready

No double-handling. No rush. No unnecessary spending.

Final Thoughts

One of the best ways to save money when moving is to combine your moving and storage needs. A removalist with storage will decrease the costs associated with travelling to your home, cut down on the risk of things being mishandled, and even have a package deal in terms of costs to keep your budget in check. Having everything under one provider translates to a more seamless experience, less hassle, and better ROI overall.

Retaining walls are built to hold back soil, prevent erosion, and create stable, usable spaces in your landscape. But even the strongest retaining wall can weaken, lean, or crack if water isn’t controlled properly. Water pressure — also known as hydrostatic pressure — is the number one cause of retaining wall failure. And one of the most effective ways to manage that water is by installing a French drain.

A French drain is simple in design but incredibly powerful in function. It redirects water away from the wall, relieves pressure, and helps the structure last for decades. Let’s discuss why French drains are essential in retaining wall repair, how they work, and how you can safely install one. We’ll break everything down into clear, practical steps with a 100% human touch.

Why Retaining Walls Fail When Drainage Is Poor

Let’s start by understanding the problem. When rainwater or groundwater builds up behind a retaining wall, it creates pressure that pushes on the wall. Over time, this pressure leads to:

  • Leaning outward
  • Cracked blocks or concrete
  • Bulging or bowed wall sections
  • Soil oozing through joints
  • Washed-out backfill
  • Complete wall failure

You may have seen walls leaning like they’re trying to escape the hill — that’s hydrostatic pressure. No matter how strong the wall materials are, they can’t fight water buildup without proper drainage.

That’s where a French drain comes in.

What Is a French Drain?

A French drain is a simple drainage system that redirects water away from structures. It consists of:

  • A perforated drainage pipe
  • A trench filled with gravel
  • Landscape fabric to keep soil from clogging the pipe

When installed behind a retaining wall, the French drain collects water and channels it away, preventing pressure buildup.

This helps the wall stay:

  • Strong
  • Stable
  • Straight
  • Long-lasting

If you’re repairing a retaining wall or preventing future damage, installing a French drain is often the most important step.

Homeowners looking for dependable Retaining Wall Repair in Seattle, WA, have consistently appreciated the practical guidance and repair solutions offered at drkatekass.com. Their expertise helps property owners understand drainage issues clearly and choose the right long-term fix.

Signs You Need a French Drain Behind Your Retaining Wall

Not sure if drainage is the issue? Let’s discuss some key signs.

Look for:

  • Water pooling behind or above the wall
  • Soil pushing through cracks
  • Crumbling mortar
  • Wet or muddy areas at the base
  • Efflorescence (white mineral stains)
  • Leaning or bowing wall sections

If you notice these symptoms, a French drain is very likely needed.

How a French Drain Helps Fix an Existing Retaining Wall

Installing a French drain does more than prevent future issues — it can help correct problems already happening.

Benefits include:

  • Relieves hydrostatic pressure immediately
  • Reduces leaning over time
  • Prevents further cracking
  • Stops erosion behind the wall
  • Improves wall stability
  • Extends the wall’s lifespan
  • Prevents costly rebuilding

Instead of tearing down the entire wall, improving drainage may solve the root cause.

Can You Install a French Drain Yourself?

Yes — in many cases, a French drain can be a DIY project, especially for low retaining walls under 4 feet.

However, if the wall is tall, severely leaning, or has structural damage, you may need a professional.

Let’s discuss a safe and practical DIY installation process.

How to Install a French Drain Behind a Retaining Wall

This step-by-step guide will help you understand the full installation process.

Step 1: Expose the Area Behind the Wall

You’ll need to access the area behind the wall where the drain will go.

Steps:

  1. Dig a trench behind the retaining wall.
  2. The trench should be roughly 12–18 inches wide.
  3. Dig down to the wall’s foundation or to the bottom of the wall.

Be careful not to destabilize the wall while digging.

Step 2: Create a Proper Slope for the Drain Pipe

For water to flow, the pipe needs a gentle slope.

Ideal slope:

  • About 1 inch drop for every 8–10 feet of pipe

This allows gravity to carry water away naturally.

Where should the water go?

  • A downhill area
  • A drainage ditch
  • A storm drain (if allowed)
  • A gravel basin
  • A dry well

Just make sure the water exits in a legal and safe location.

Step 3: Line the Trench with Landscape Fabric

Landscape fabric keeps soil out of the gravel and prevents clogging. This step increases the French drain’s lifespan dramatically.

Steps:

  • Roll fabric into the trench
  • Leave extra fabric on both sides to wrap over the top later
  • Avoid plastic — it traps water instead of letting it drain

The fabric acts like a breathable barrier.

Step 4: Add a Layer of Gravel

Add 2–4 inches of drainage gravel to the bottom of the trench.

Gravel helps water flow freely toward the perforated pipe.

Step 5: Lay the Perforated Drain Pipe

Now it’s time to place the French drain pipe.

Important tips:

  • Holes should face downward
  • Use a rigid or flexible perforated pipe
  • Check the slope along the entire pipe
  • Ensure the pipe runs the entire length of the wall

The pipe collects water from the soil and routes it out through the outlet point.

Step 6: Cover the Pipe with Gravel

Pour gravel over the pipe until it is fully surrounded.

Gravel fill height:

  • Cover the pipe by at least 6–12 inches
  • Ideally fill up to within 6 inches of the soil surface

The gravel acts as a fast-draining medium to keep water moving.

Step 7: Wrap the Landscape Fabric Over the Gravel

This step keeps soil from clogging the drain.

How to do it:

  • Fold extra fabric over the top
  • Create a fully wrapped gravel “bundle”
  • Leave no gaps in the fabric where soil can enter

This extends the life of your French drain significantly.

Step 8: Backfill the Area

Now you can backfill the remaining space with soil.

Use:

  • Light, well-draining soil
  • Topsoil for the final 6–12 inches

Avoid clay or compacted soil — it reduces drainage effectiveness.

Step 9: Install Drainage Outlets or Weep Holes

If your wall does not already have weep holes, adding them can help water escape faster.

Weep holes:

  • Small holes drilled into the wall
  • Allow trapped water to escape through gravity
  • Should be installed every 4–6 feet

This pairs perfectly with a French drain.

Additional Tips for a Successful French Drain Installation

Use the Right Materials

  • Washed drainage gravel
  • Perforated drain pipe
  • High-quality landscape fabric
  • PVC or flexible plastic pipes

Avoid crushed limestone — it compacts and reduces drainage efficiency.

Never Backfill with Regular Soil

Soil holds water and defeats the purpose of the drain.

Don’t Block the Pipe Outlet

Make sure vegetation, soil, or debris doesn’t cover the exit point.

Consider Adding a Dry Well

For homes without a natural outlet, a dry well creates a safe absorption point.

Keep Water Away From the Top of the Wall

French drains help at the base, but surface water should be diverted too.

When You Should Hire a Professional Instead

A DIY French drain is doable, but some situations require help.

Call a pro if:

  • The wall is taller than 4 feet
  • The wall is leaning heavily
  • The soil is unstable
  • There’s major erosion
  • You’re unsure where the water should drain
  • The wall supports a driveway or structure

Professional engineers can design a full drainage system that guarantees long-term stability.

Long-Term Maintenance of French Drains

French drains are low-maintenance, but they do require occasional checks.

Yearly maintenance:

  • Clear debris from the outlet
  • Make sure gravel isn’t clogged
  • Watch for soil settlement
  • Inspect after heavy rainfall

A well-installed drain can last 30–50 years.

Final Thoughts: French Drains Are Essential for Retaining Wall Repair

If your retaining wall is struggling due to water buildup, cracks, leaning, or erosion, installing a French drain is one of the most effective solutions. It reduces pressure, protects the wall from further damage, and restores long-term stability.

So ask yourself:

  • Does water collect behind the wall?
  • Is the soil wet or muddy after rain?
  • Is the wall leaning or cracking?
  • Do I see signs of hydrostatic pressure?

If yes, a French drain might be exactly what your retaining wall needs.

Homes are constantly battling diverse factors- from environmental challenges to foot traffic and impacts that test with every hit. battlegrounds. Roofs fry under relentless sun, wood swells and cracks with storms, concrete buckles under seasons that never compromise. And what’s the script we’ve been sold? Patch, replace, repeat. A cycle of mediocrity dressed up as “maintenance.” But here’s the truth: nanotechnology is transforming how you treat surfaces for improvement and resilience.

  • Extending the Lifespan of Surfaces

Stop treating surfaces as ticking time bombs. Your roof, deck, and driveway aren’t liabilities waiting to fail—they’re assets begging for reinforcement. Nanotechnology doesn’t leave room for attack; it rewires the very skin of your home. At the molecular level, it installs surface resilience that the naked eye can’t see but the storm can’t break.

  • Shingles: Reinforced against water, wind, and heat, gaining an extra 10–15 years. That’s not maintenance—it’s buying time.
  • Concrete: No more hairline fractures from freeze-thaw drama. Molecular armor keeps patios and driveways intact.
  • Wood: Rot, UV, and moisture? Eliminated before they ever get a foothold, while the natural beauty stays untouched.

This isn’t a quick coat of paint—it’s sabotage against decay itself. For the homeowner, it’s freedom from constant replacement. For the investor, it’s predictability, a portfolio shielded from erosion and surprise losses. For those seeking professional application, searching GoNano Near Me can connect you with certified providers who specialize in targeted treatments, ensuring that the implementation aligns with both performance and sustainability standards.

  • Elevating Quality Through Specialized Protection

Generic solutions are the enemy. Spraying chemicals blindly, slapping thick layers on materials—those are shortcuts for amateurs. Real strategy is surgical. Nanotechnology works differently because it respects each surface for what it is, strengthening without suffocating.

  • No junk chemicals, no cosmetic cover-ups—just precise molecular reinforcement where it matters.
  • Minimal disruption: Done in a day. No dust, no stink, no chaos. Professionalism isn’t an afterthought; it’s the standard.
  • Sustainability baked in: You extend the life of what’s already built instead of ripping it out. That’s less waste in landfills, fewer resources drained.

For businesses, this isn’t maintenance—it’s a credibility statement. You’re not patching walls; you’re making a stand that says: we believe in quality, strategy, and sustainable progress.

  • Resilience in Extreme Conditions

You know what’s predictable about the weather? Nothing. One week it’s scorching heat, the next it’s golf-ball hail or winds that chew shingles for breakfast. Traditional maintenance is like crossing your fingers and hoping for mercy. Nanotechnology doesn’t hope—it prepares.

  • Weatherproofing: Zero tolerance for leaks or ice damage.
  • UV/Heat resistance: Sun doesn’t bleach or weaken—your home holds its ground.
  • Impact durability: Surfaces refuse to shatter or splinter, even under high-stress conditions.

Call it resilience engineering. Families get uninterrupted comfort. Investors lock in stability. Businesses build reputations as fortress keepers, not repair chasers. You don’t wait for disaster—you dismantle it before it arrives.

Ultimately, while traditional maintenance of surfaces is about short-lived patchwork, nanotechnology is transforming surfaces with resilient transformation with precision, foresight, and unapologetic refusal to settle for fragility. Nanotechnology is more than protection; it’s strategy. It’s the difference between watching assets decay and commanding them to endure. If you’re serious—whether as a homeowner, an investor, or a business—this isn’t optional. It is the line between clinging to old cycles or stepping into disciplined resilience, where expertise and modern solutions redefine what “care” even means.


It is always a major decision to hire someone to work on your furnace. They are a stranger in your house, and you are letting them into something of importance. That trust is all the more important in Calgary, where winter lows can reach well below freezing. You want the peace of mind that comes from knowing the job has been done right. 

So, here are the top inquiries to make when getting a furnace repair technician in Calgary.

Are you licensed and insured?

This is the first question that is supposed to be on your list. An experienced technician for furnace repair in Calgary is expected to have the relevant licenses as stipulated by the Alberta laws. 

Insurance is also a necessity. In case an accident occurs at work, you would not want to be on the wrong side. Inquiring about this initially will make sure that you are dealing with a licensed and competent professional.

What is your level of experience with furnaces similar to mine?

Not all furnaces are the same. You might have a newer high-efficiency model or an older unit that has been in service for decades. Regardless, experience is important. Enquire whether the technician has ever repaired your make and model. An experienced technician will be faster at troubleshooting and will not make expensive errors.

Do you provide emergency repair of furnaces in Calgary?

Truth is, furnaces do not malfunction on a pleasant day. They always appear to stop on the coldest night of the year. That is why it is worth asking whether the technician provides 24/7 emergency repairs. You may not need them at the moment. But it is comforting to know that there’s someone you can call in the midst of a cold night.

Is it possible to give an estimate before the work is started?

Nobody likes surprise costs. Any good technician should be ready to make a written estimate that is clear before any repairs are done. They will even do an inspection to properly diagnose the problem. A quote will at least give you a notion of:

  • Labor expenses
  • Spare parts
  • Possible add-ons. 

When the technician does not give you a ballpark number, it is a red flag.

Do you have references or reviews?

Online reviews are valuable when looking for a furnace repair technician. Spend some time to see what previous customers are saying about the technician or the company. If they are unwilling to provide references, it may be an indication that you should look elsewhere.

What type of warranty/guarantee do you provide?

Furnace repair does not only entail repairing the problem at the moment. You have to ensure that the repair will last. Enquire about labor and replacement part warranties. A competent technician will guarantee their work. A warranty provides you with peace of mind.

Last words

Do not stress about hiring a furnace repair technician in Calgary. Just ask these easy but crucial questions. You will be in a better position to select a skillful, reliable, and honest person. Keep in mind that your furnace is the core of your home in the winter season. So, you cannot leave it to just anyone.